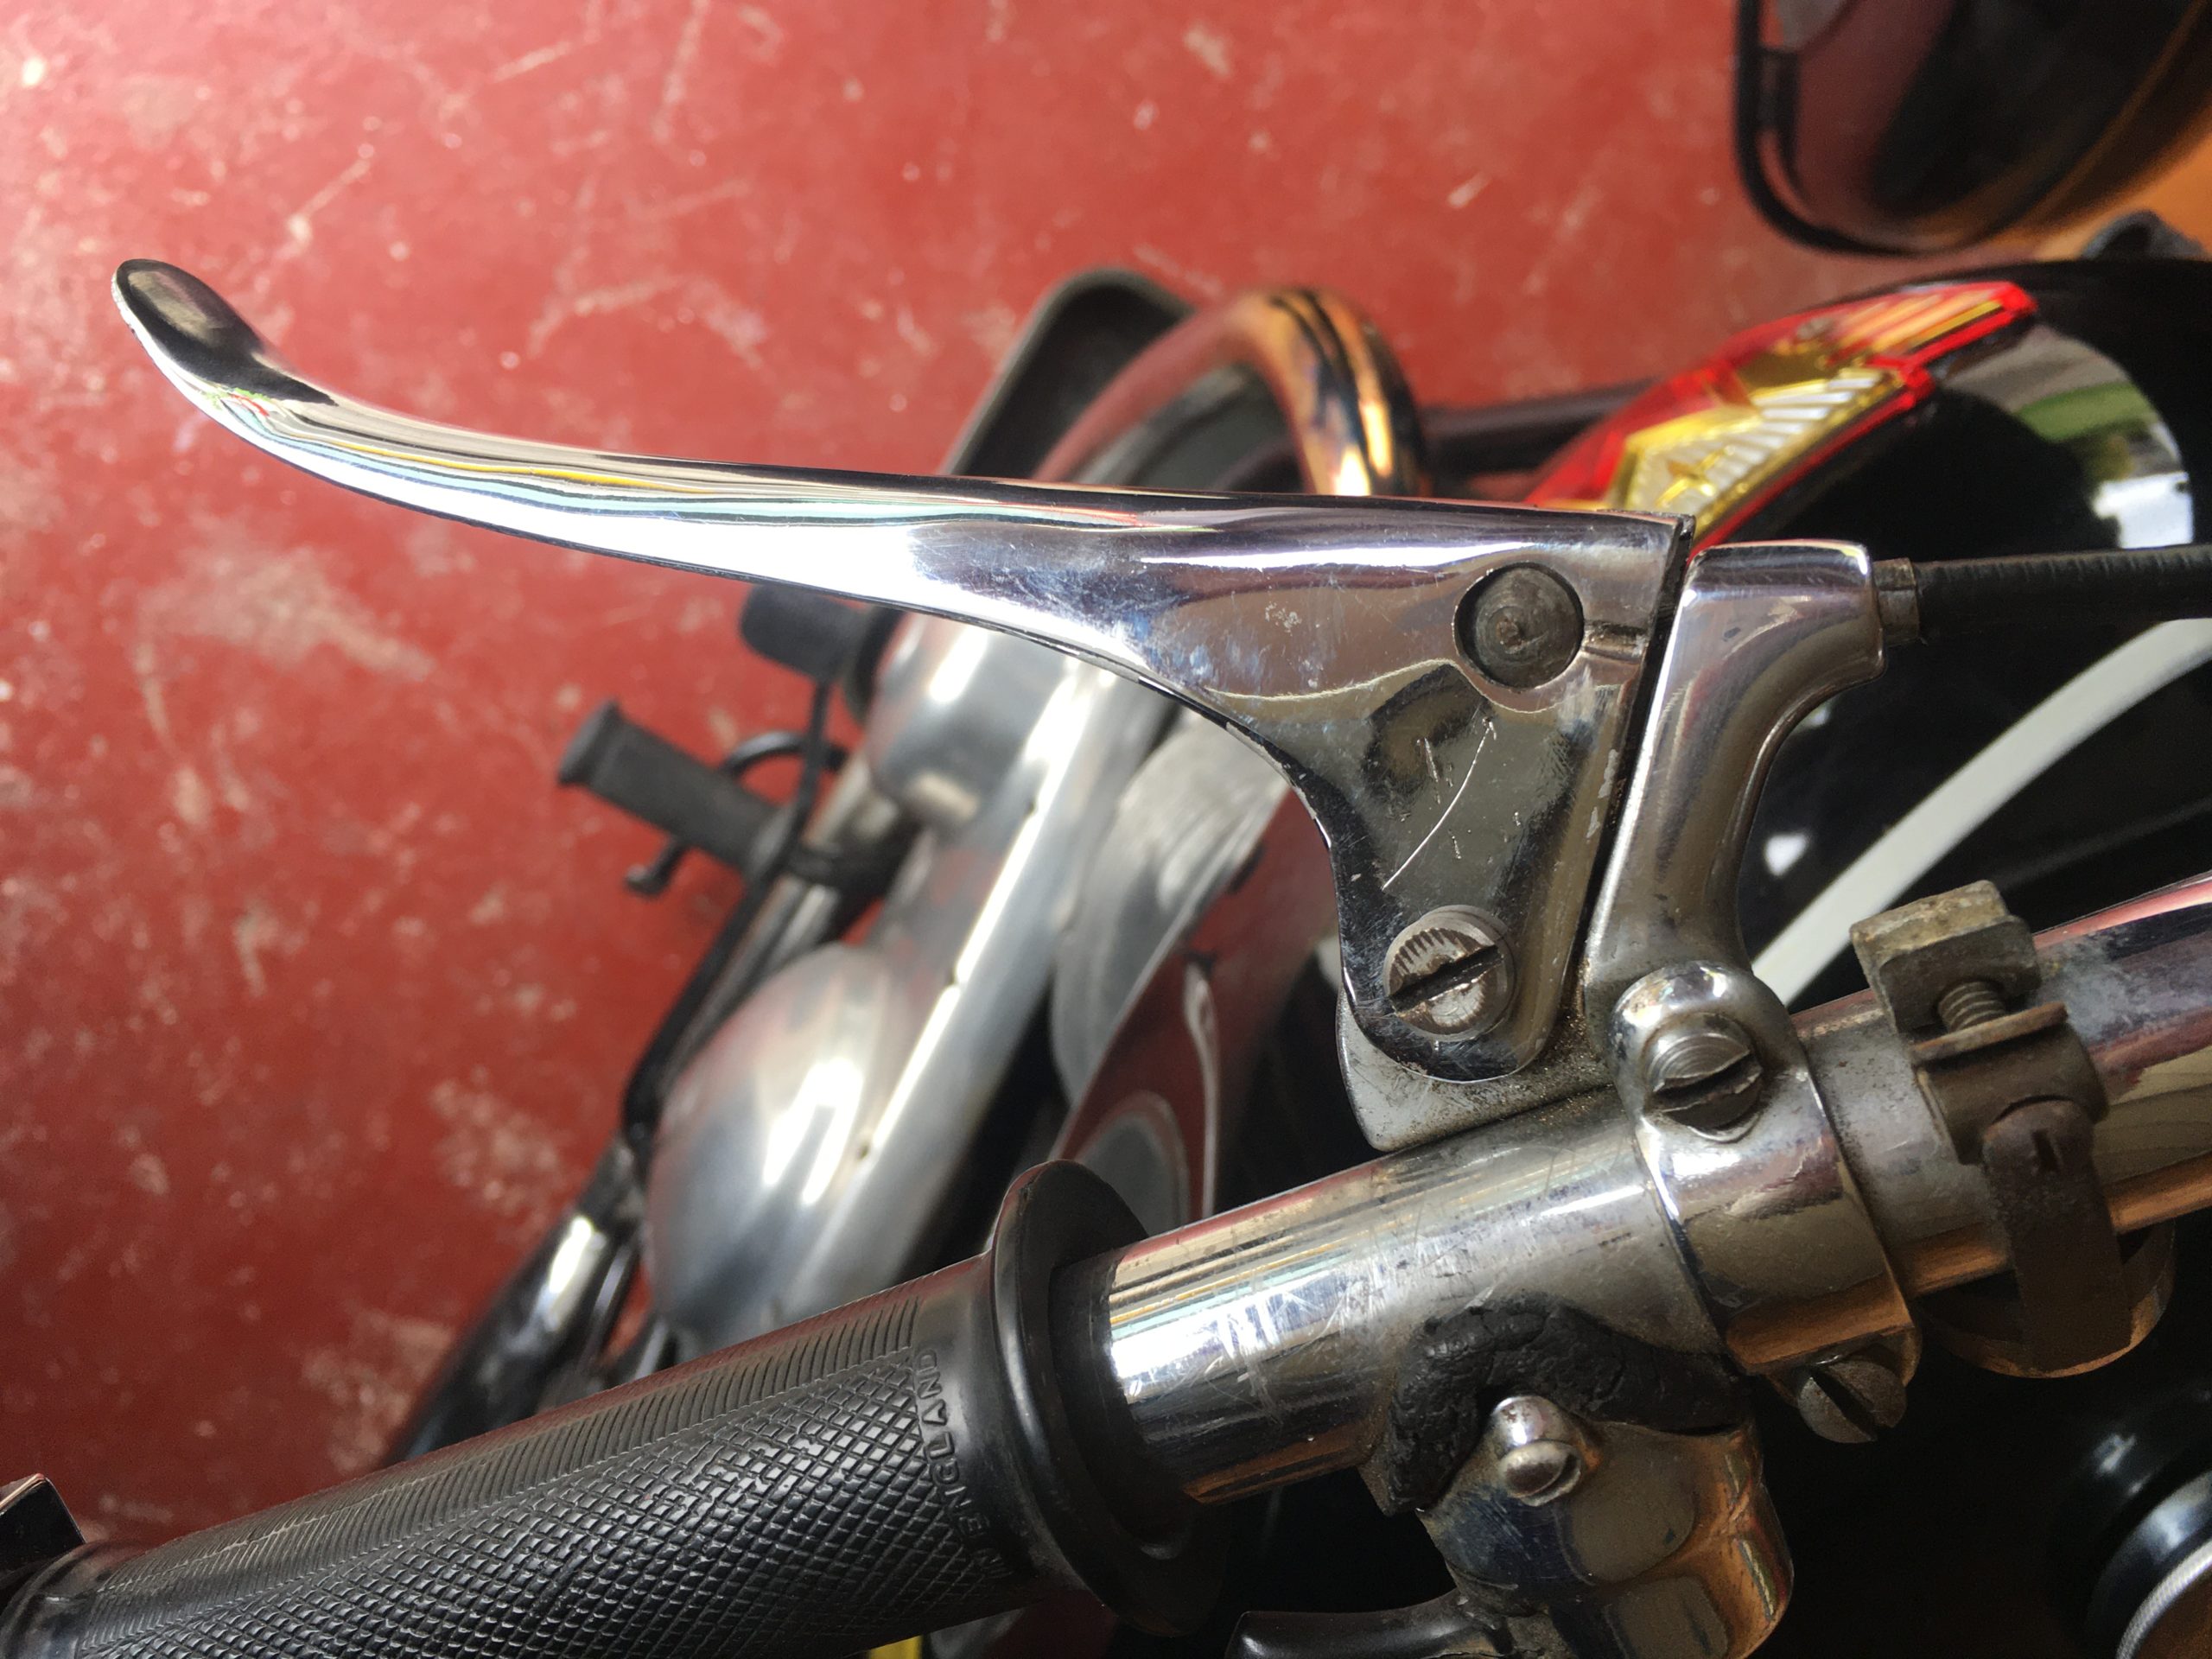
Clutch Lever
Incorrect pivot centres
At some point the clutch lever had either been badly bent or removed for another project. The pivot centres, i.e. the distance from the centre of the pivot bolt to the centre of the nipple holder, is supposed to be 7/8 inch on this bike. The handle, but not the body, had been replaced with a one inch pivot centre part. The end result was a heavier clutch with a cable that didn’t run straight when the lever was pulled. A heavy clutch was the reason my seller gave for selling the bike; there are geared clutch levers available and PTFE lined cables for good measure. The complete lever assembly was replaced with the correct 7/8 inch Doughty unit. As the cable had also been jamming in the steering lock stops, it was replaced too.
You might be able to spot the dip switch for the headlights, complete with the separate horn button. I’m assuming this was a poverty fix when the button came off the dip switch. Both items were replaced with the correct, combined unit.
Rubbers
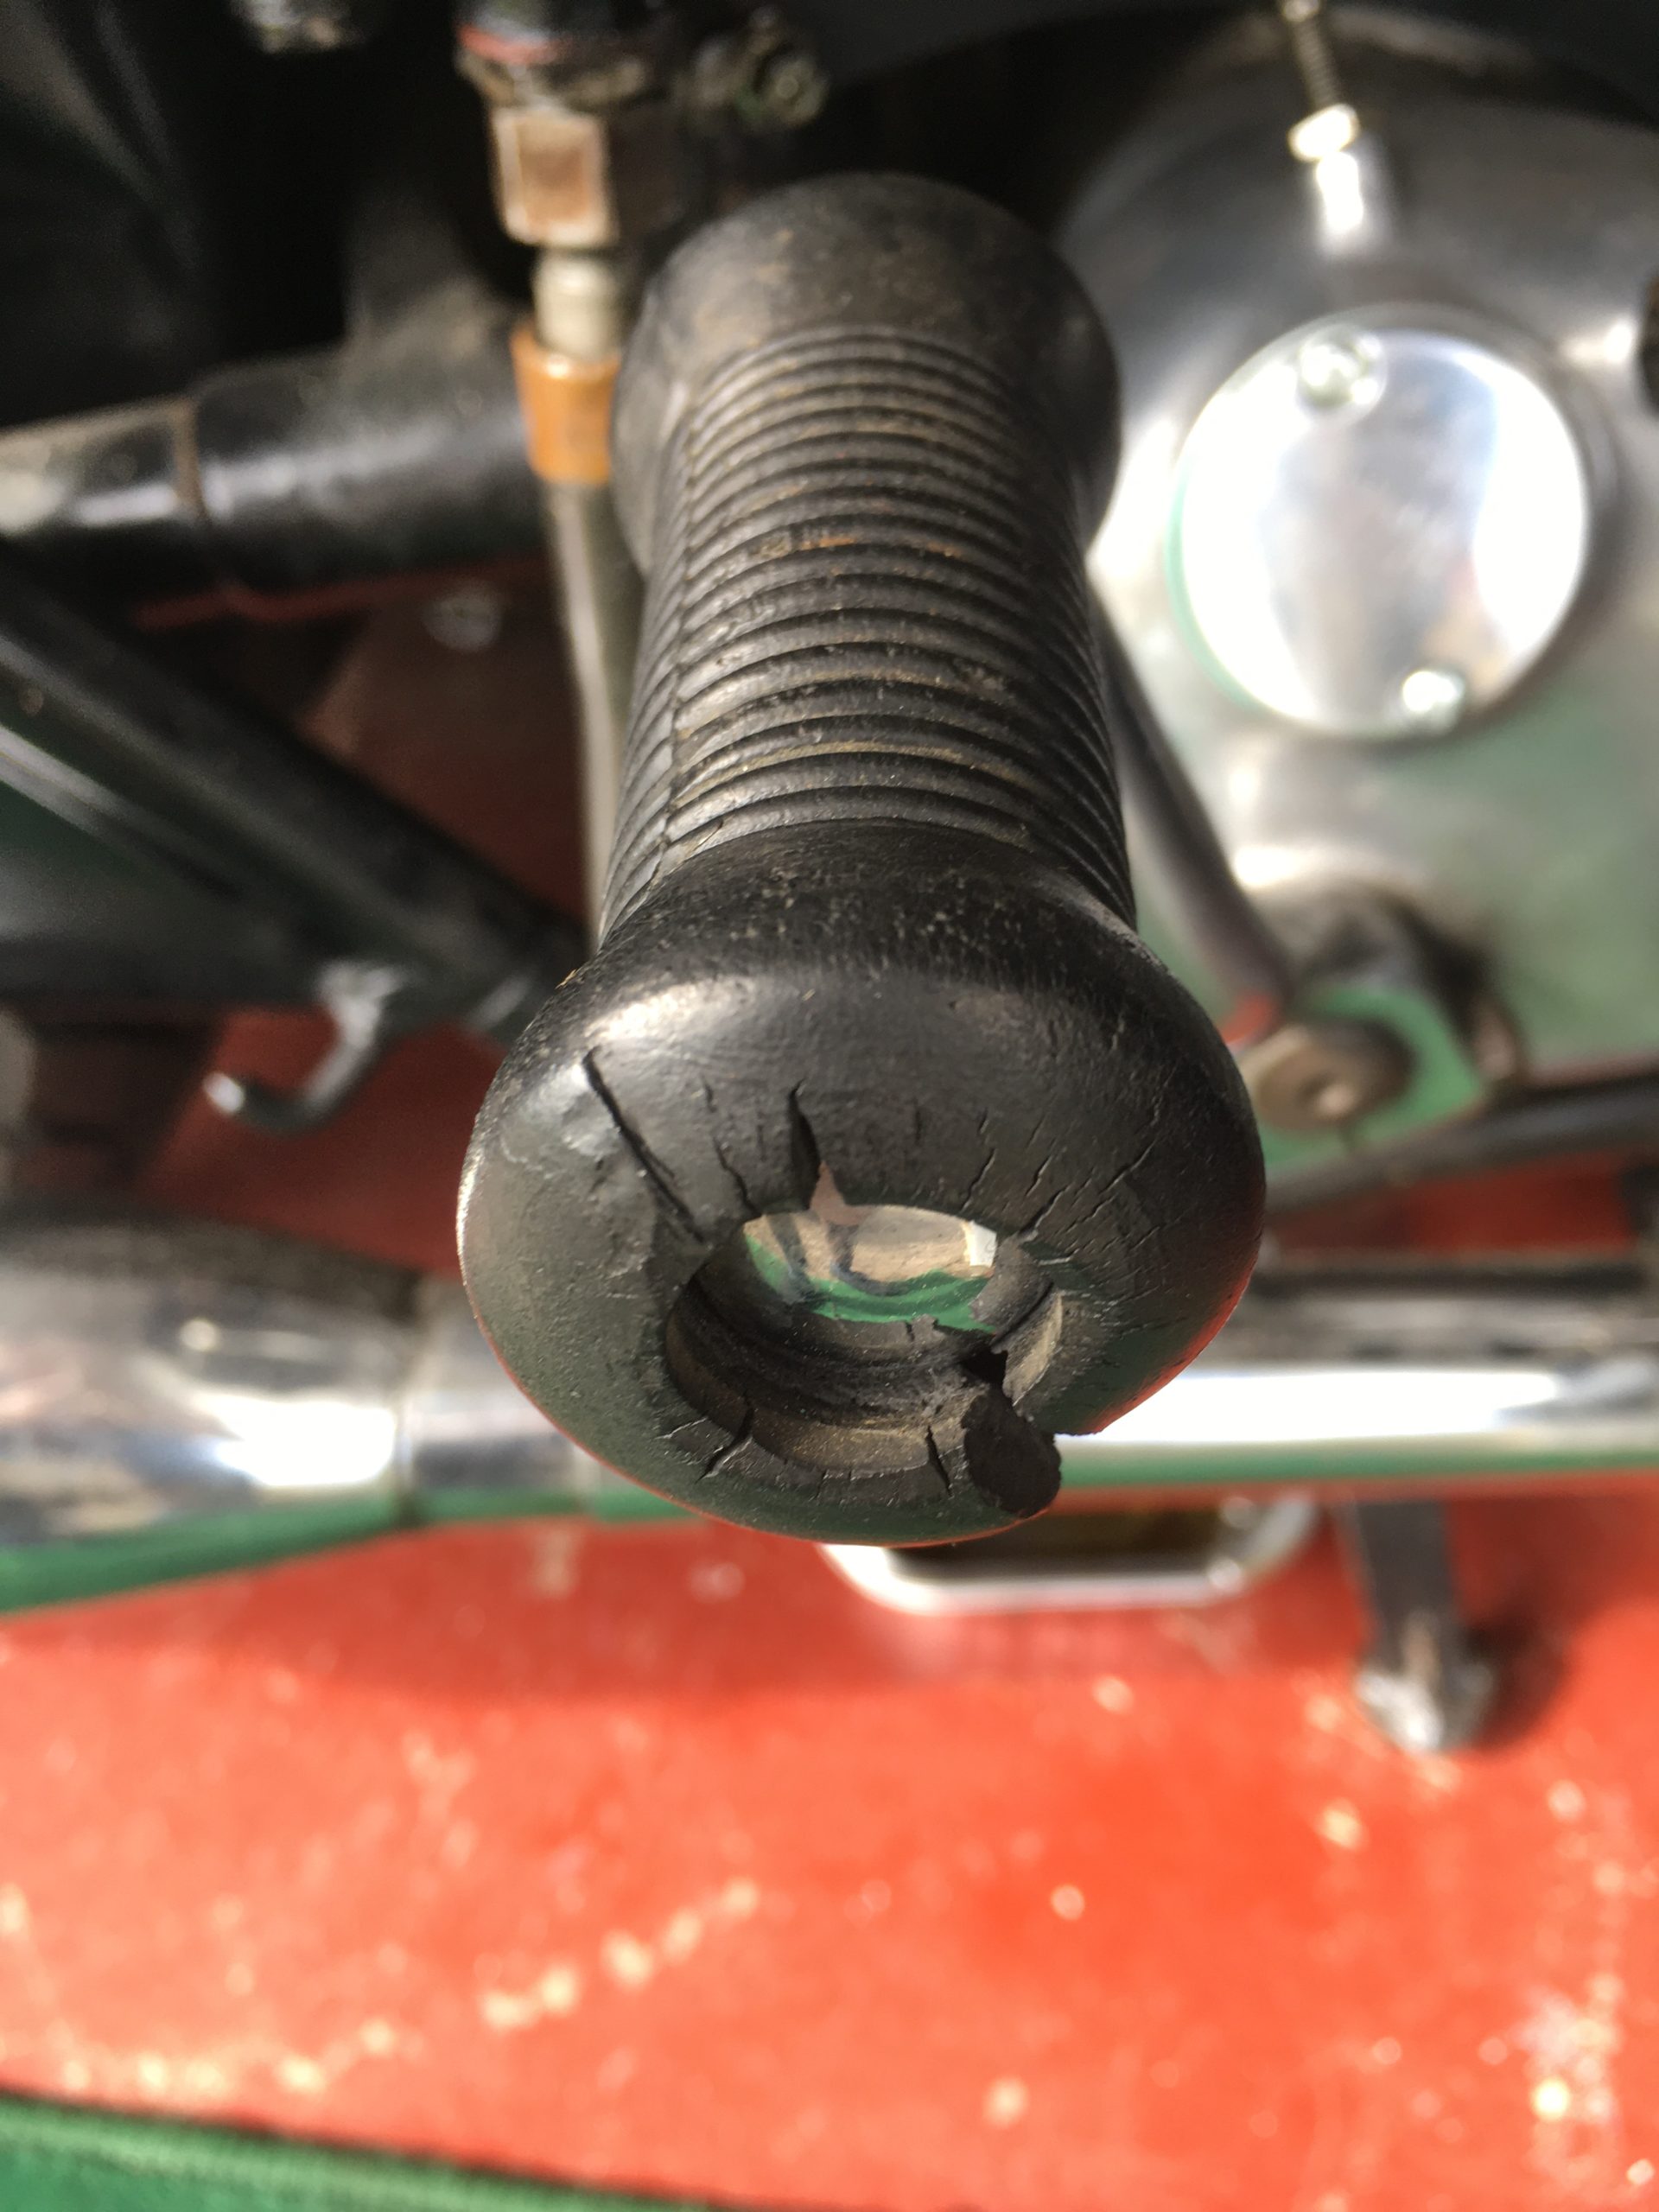
Cracked kick start rubber
Most of the rubbers on the bike were good, however the kickstart and gear lever rubbers had seen better days…both were replaced. Someone had fitted a chunkier Burman gear lever rubber which I replaced with a more slender AMC one.
Some people use liquid soap to help the rubbers slide over the lever ends; I use a small amount of silicon grease.
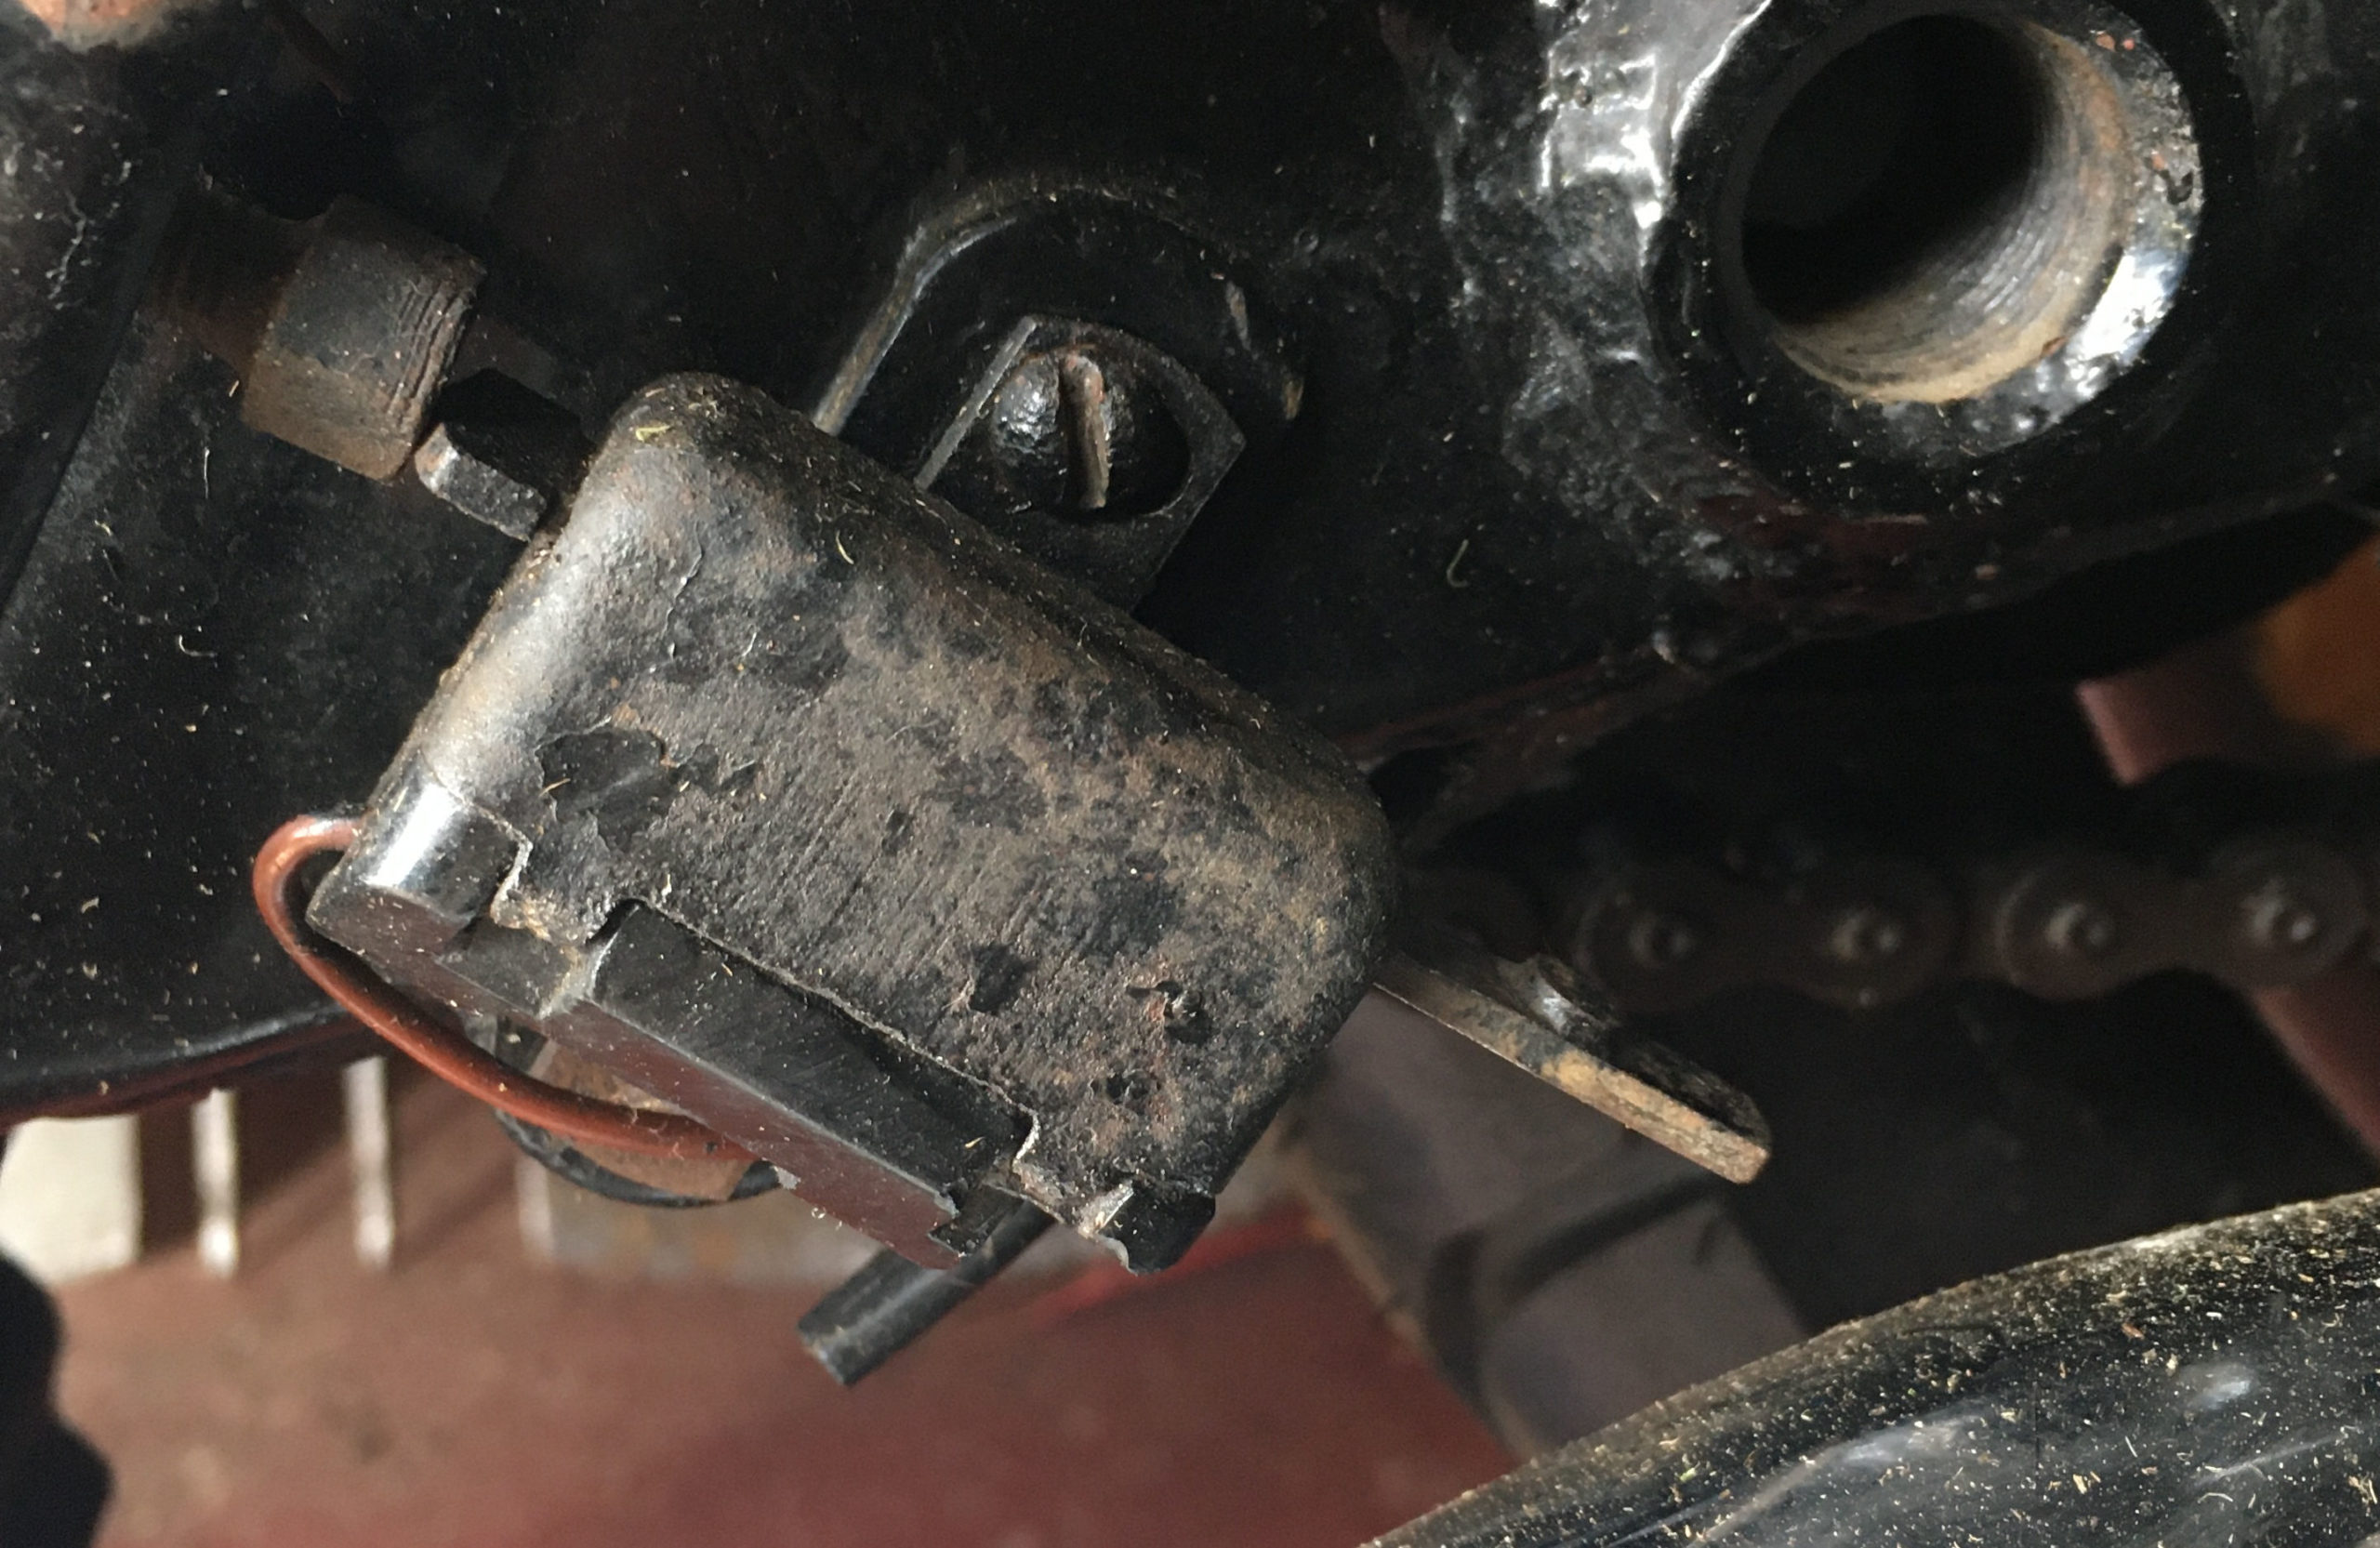
Steering Damper
In case you didn’t know, these were simple devices designed to give some friction to the action of turning the handlebars. Essentially, they have three fixed plates with two friction plates between them, much like a basic clutch. There’s a knob in the middle of the steering yolk which the rider can turn to increase or decrease the friction between the plates, and therefore the damping on the steering. Many people rely on them to prevent ‘tank slap’ or oscillating left / right movement of the steering due to uneven roads, especially at speed when cornering. It’s important to remember to loosen the damper off in slower moving traffic, such as in town.
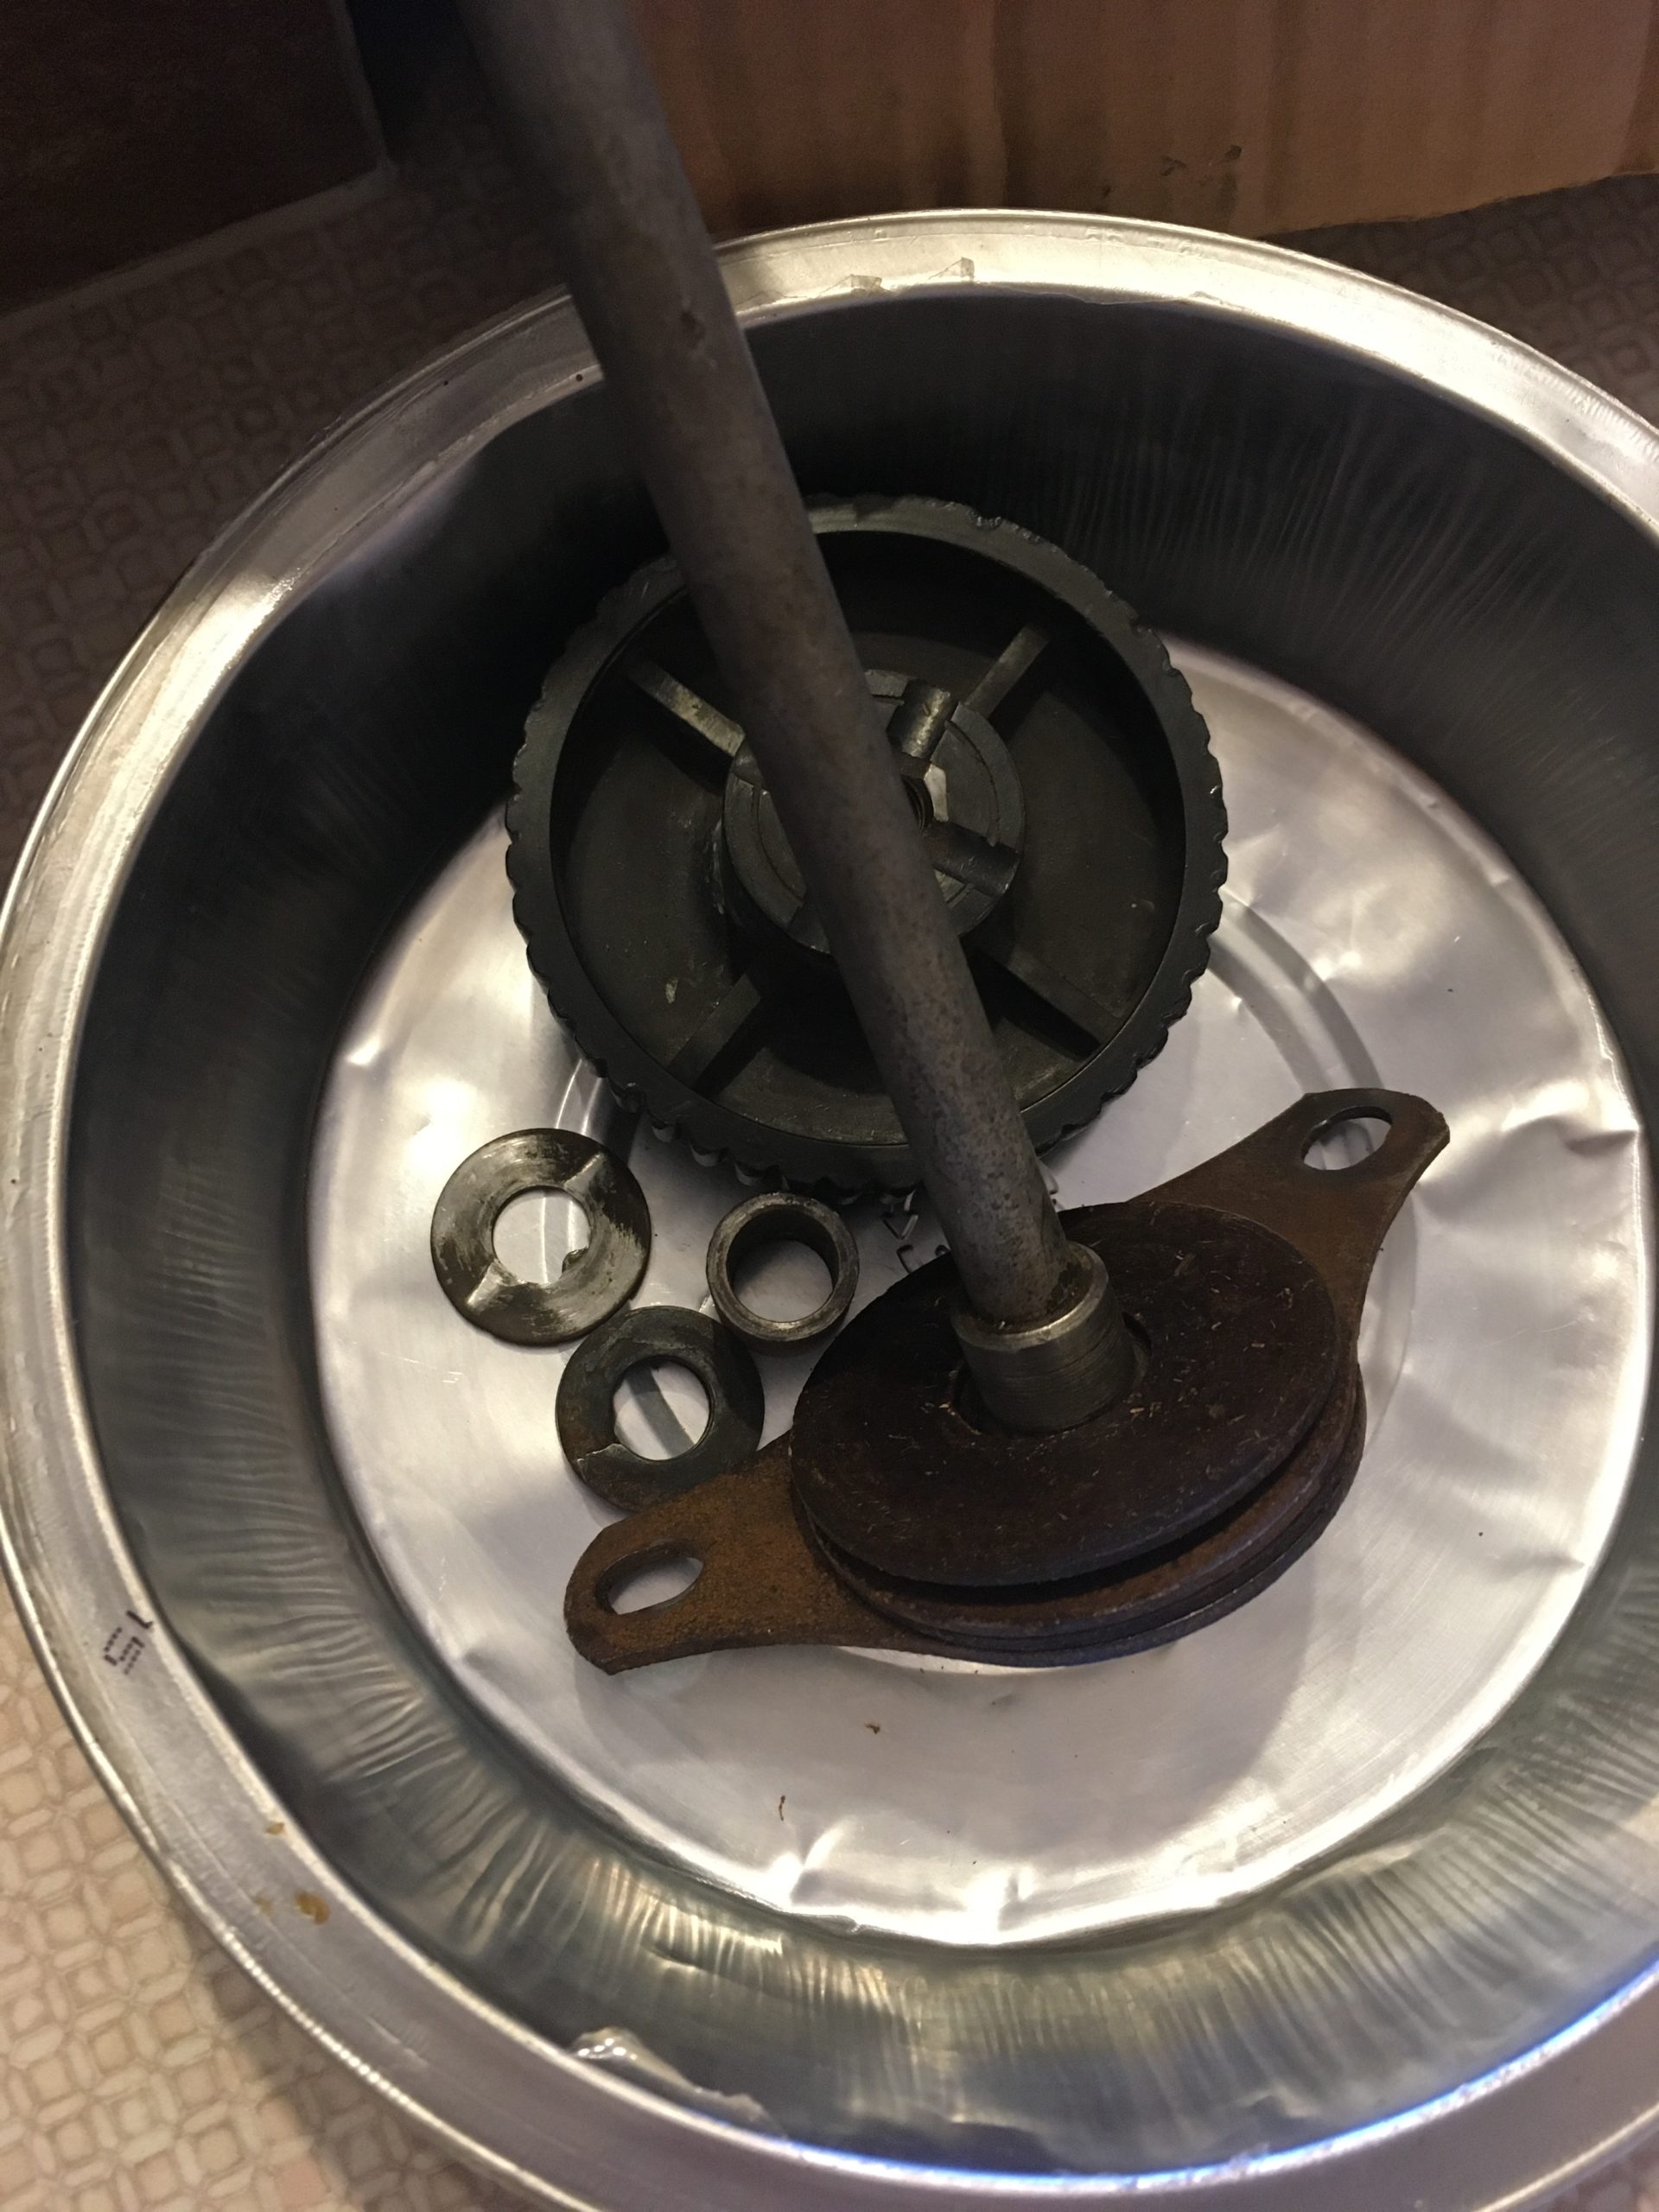
Removed and ready for a good clean
Mine didn’t really work; the knob had to be very tight and it moved and undid itself when turning the steering. It quickly became evident that some muppet had bolted BOTH fixed plates to the frame of the bike, which meant the washer under the damper knob was doing the damping…or not! I removed the damper and discovered it was also thoroughly slathered in grease; remember, it has friction plates! It was thoroughly cleaned and reassembled on the bike correctly. As you can see, because of the location of the parts, they do get rather dirty. Modern bikes use what looks like a small shock absorber to do a similar job.
The frame of every Matchless motorcycle I’ve ever seen, has the necessary part of the friction-style steering damper, cast into it….complete with tapped holes for the fixing bolts. The dampers were standard on the ‘CSR’ versions of the bikes, or could be ordered as an extra. In case you didn’t know, ‘CSR’ stands for ‘Competition-Sprung-Roadster’.
Here’s another picture of the damper, this time it’s fitted to the bike. Don’t worry about the rust as the operating surfaces are just fine. I might put some zinc paint on the rusty bits next time I dismantle it. Judging by the wear on the ratchet washer, under the knob, this had been incorrectly installed for some time. The underside of the steering yolk has the first fixed plate, a friction plate is then sandwiched between that and the next fixed plate which is bolted to the bike’s frame.
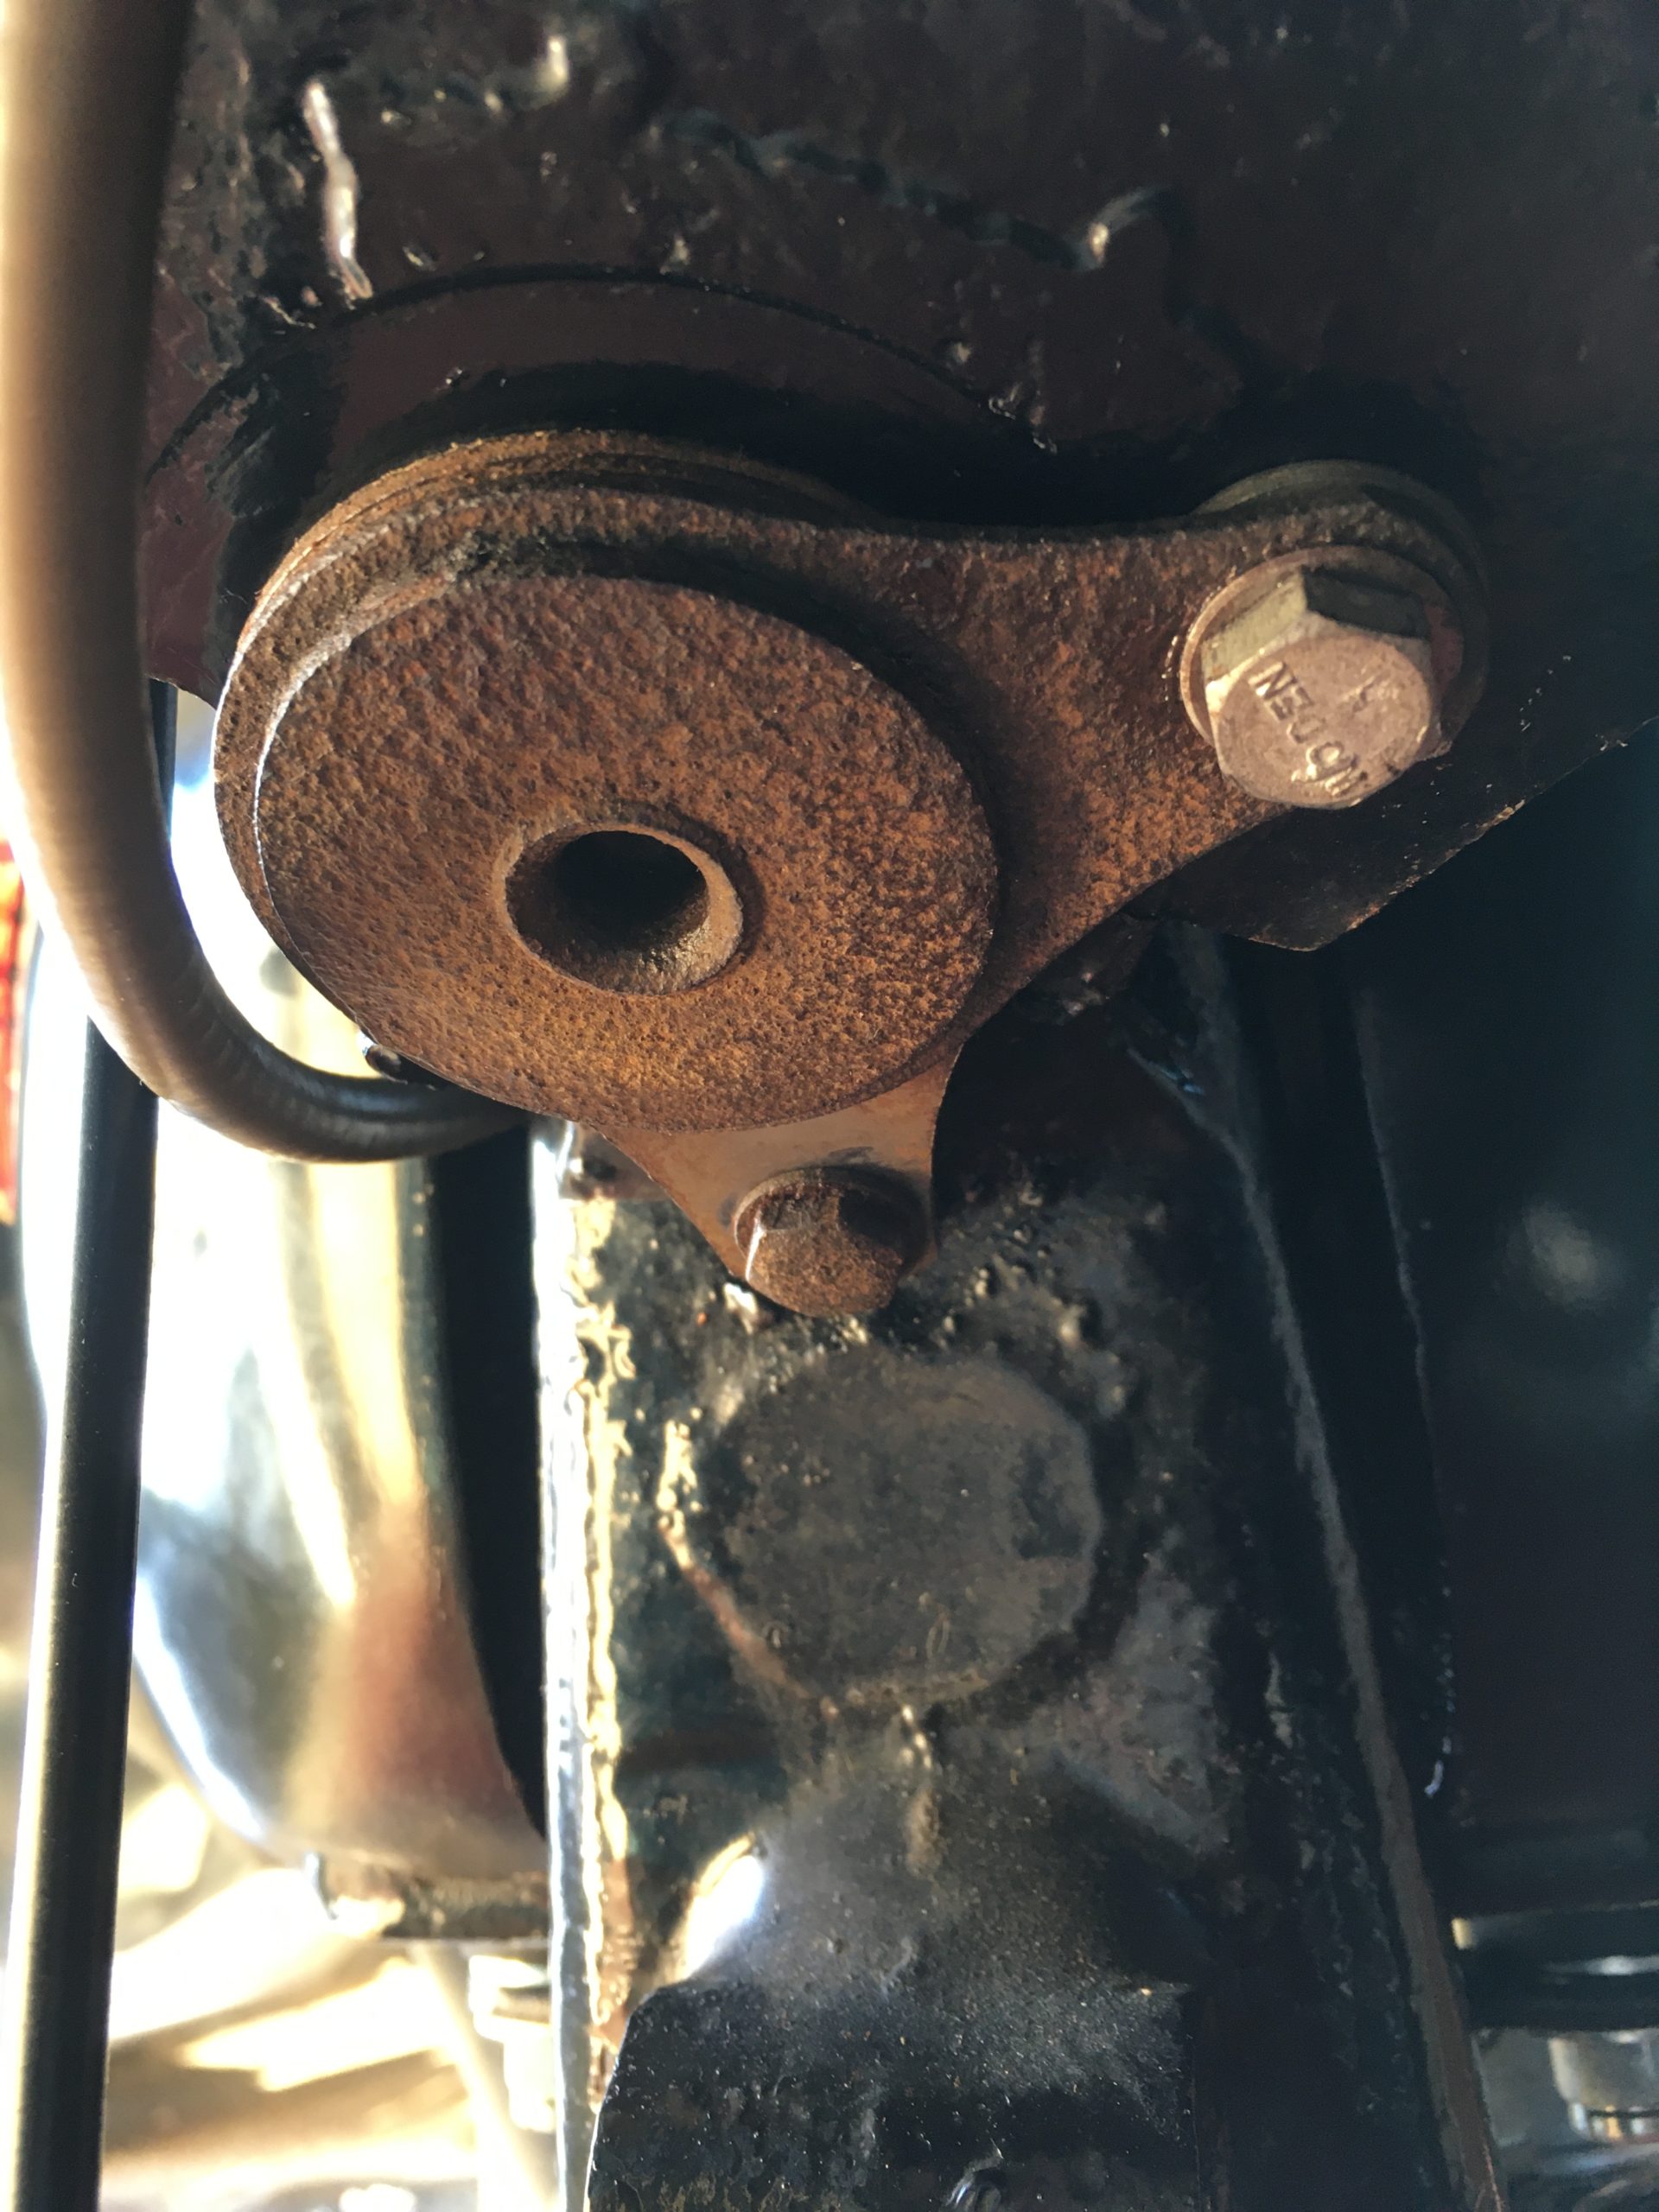
Reinstalled on the bike
Another friction plate is then sandwiched between that and the bottom fixed plate, which is bolted to the bottom fork yolk. This means the adjuster knob just increases the friction between the plates, without becoming part of the process directly.
I have to wonder why it was incorrectly installed as the way they work is fairly self explanatory. Maybe the muppet lost one of the bolts and couldn’t be bothered to find another one.
Stop Lamp Switch
Mine was the original item by the look of it. Yes, it worked…but not reliably. In case you didn’t know, these switches default to ‘on’ when released. This means a sticky one will not operate the stop lamp reliably. They can be dismantled and cleaned, but mine had some rust on the metal operating mechanism so I treated myself to a new one.
Be careful what you buy as these are about £18 for a proper Lucas item, and there is an identical version that defaults to ‘off’.
Rather crusty stop lamp switch
The correct item is a Lucas 22B Brake Light Switch 31383. On this bike, the stop lamp / brake light will come on if you press the pedal, which allows the spring in the switch, to move the operating peg and close the contacts.
Battery
When I bought the bike, it had a fairly new and perfectly good Motobatt MB9U battery installed. This size of battery is normally fitted to bikes with electric start, indicators and other modern luxuries. It’s too heavy for the battery carrier on the G12 and when you try to take it out for any reason, the terminal can easily catch on the sides of the battery box. Following the advice of Steve Surbey from AMC Classic Spares, I purchased a 12N5-3B battery locally; it’s slightly smaller and the terminals are orientated in the opposite way to the Motobatt. The AJS and Matchless Owners Club supply the Motobatt as standard, but it really is too big.
I also took the opportunity to fit an inline fuse…fuses are cheaper than wiring harnesses. The original battery strap, the classic inner tube and two nails arrangement, was replaced with a proper battery strap from AMC.
Gear Box Inspection Cover
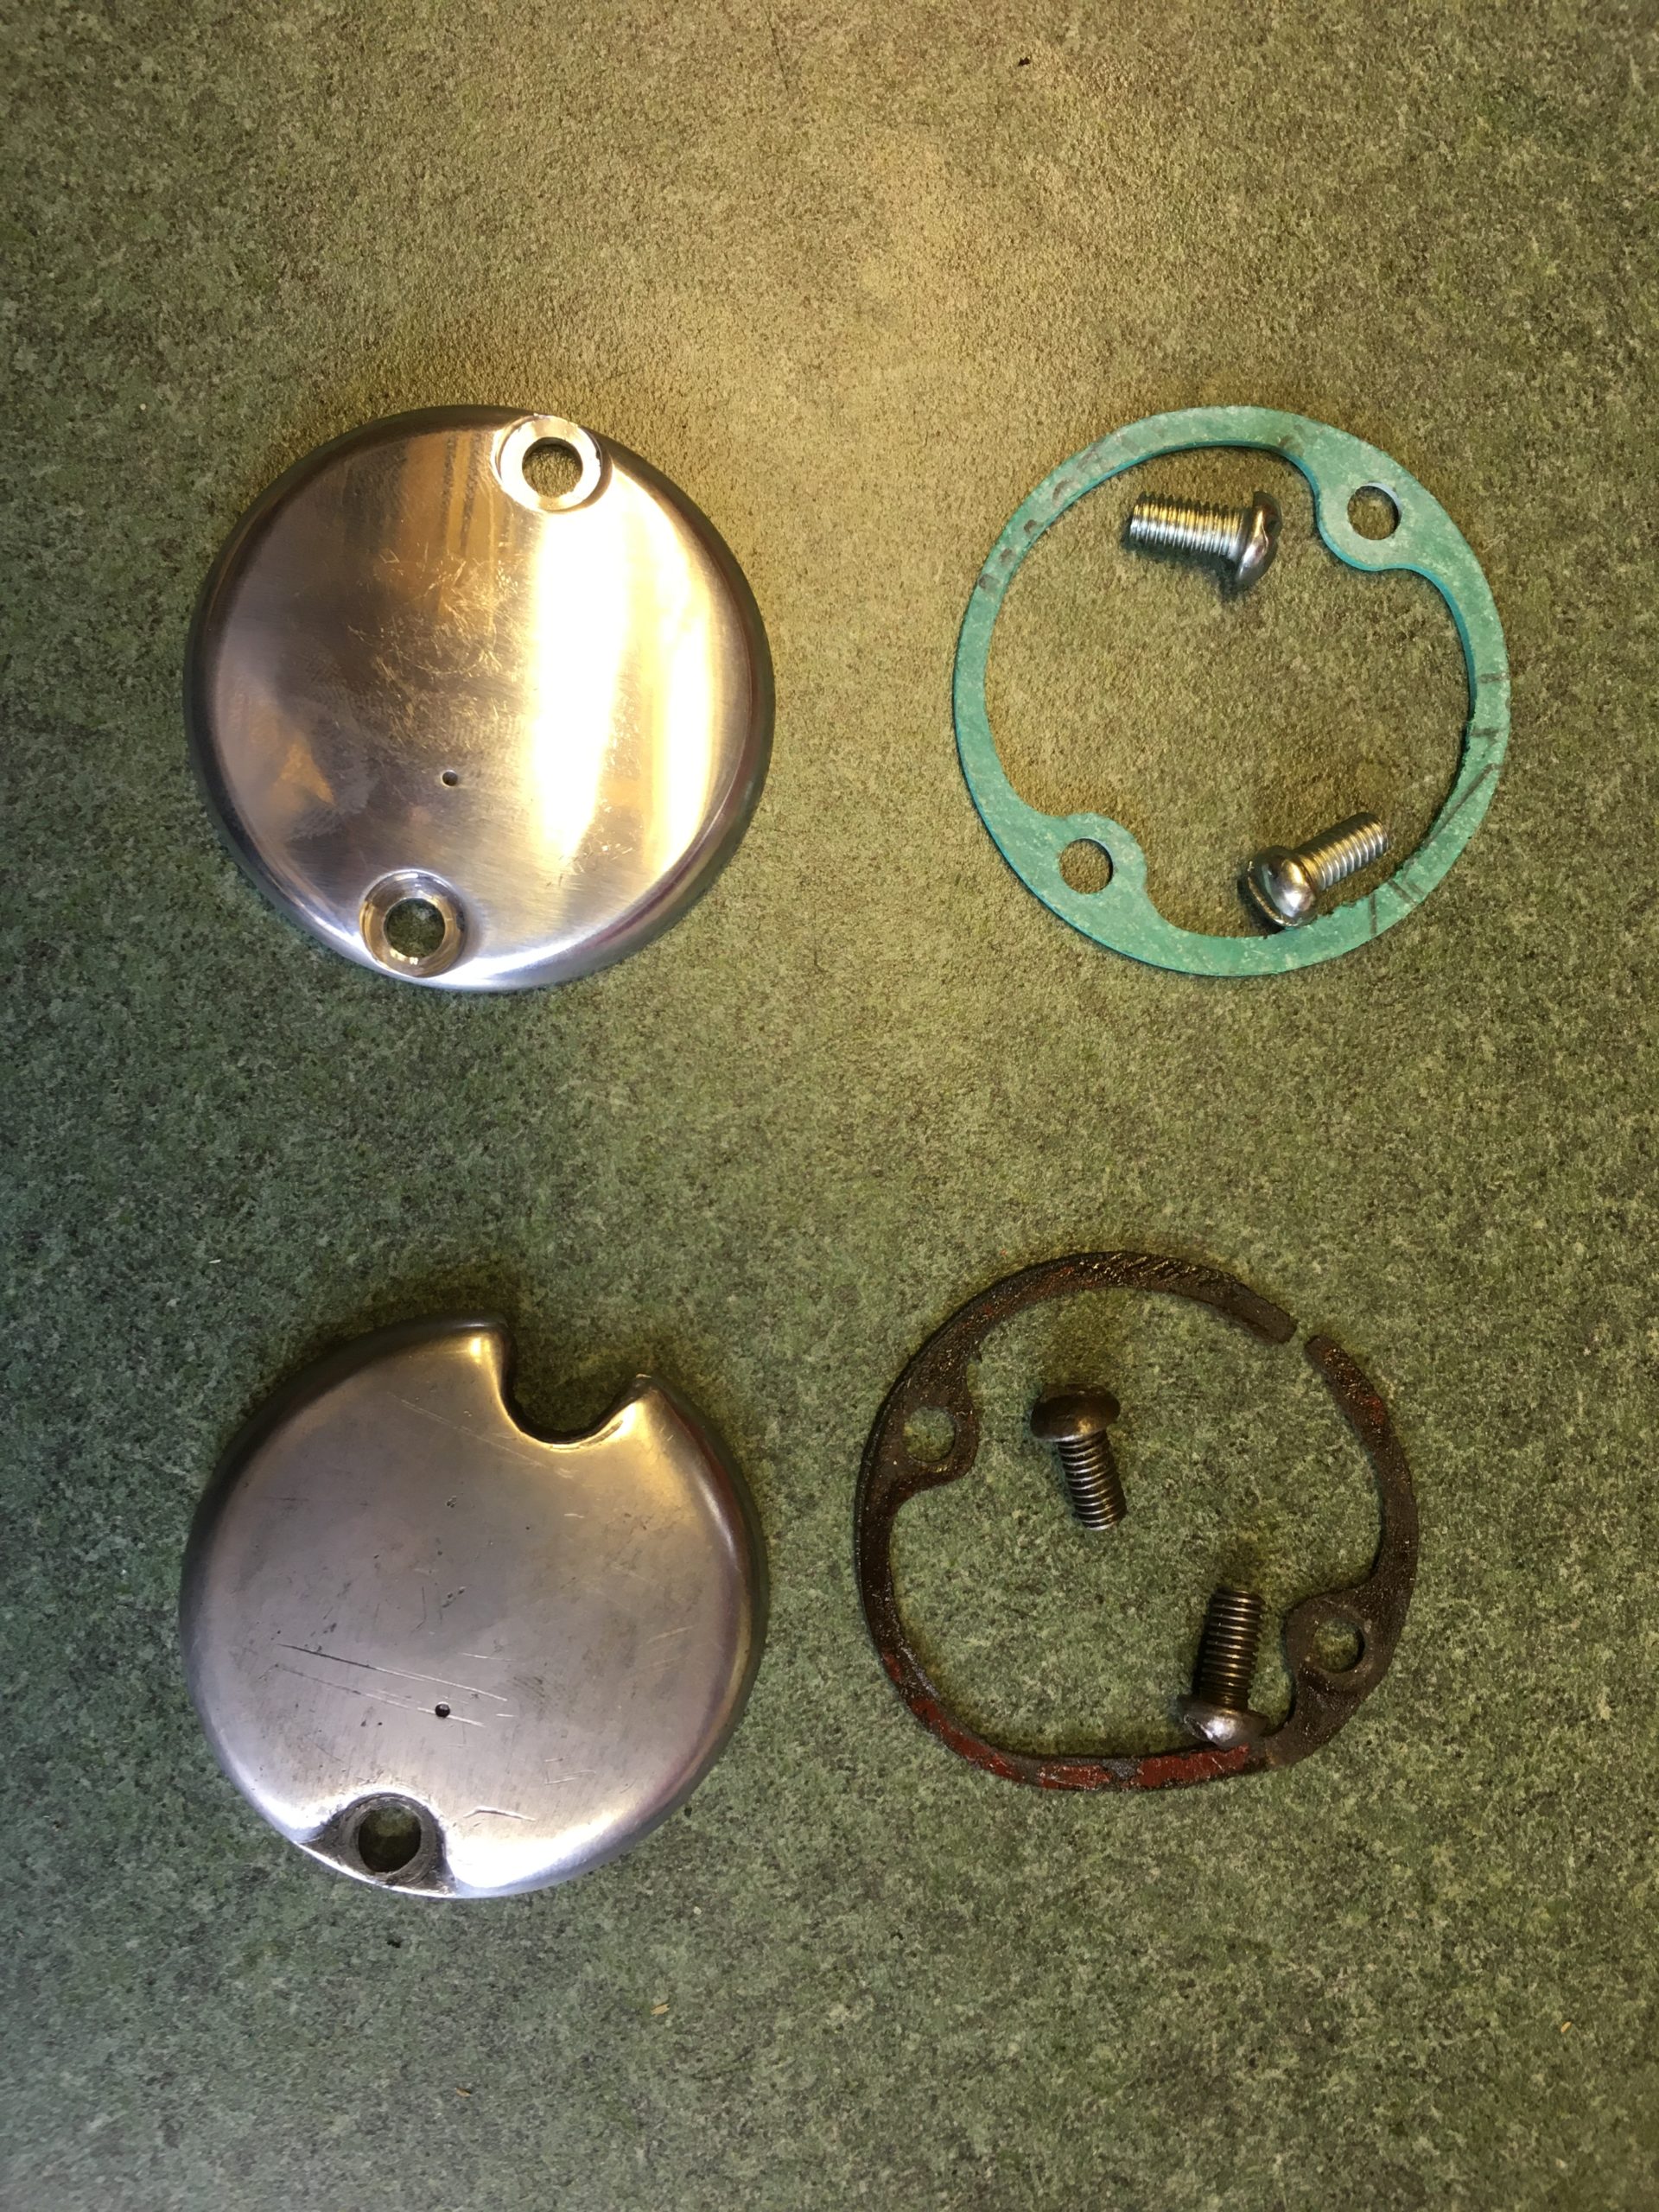
AMC inspection covers
Quite simply, one of the two mounting holes wasn’t there. These covers have thin metal areas with holes in, to provide a way of fixing the cover to the gearbox safely, whilst looking aesthetically pleasing. The owner had put the screw in, so unless you removed the cover, you’d never notice. Bear in mind, the proper item is £18.
Speedometer Shock Absorbers
These sound rather grander than they are…they are simply a set of rubber grommets that mechanically insulate, to some degree at least, the mechanical part of the speedometer, from the vibration that runs throughout the bike.
Of course, being a Matchless twin, the vibration is less than on most 😉
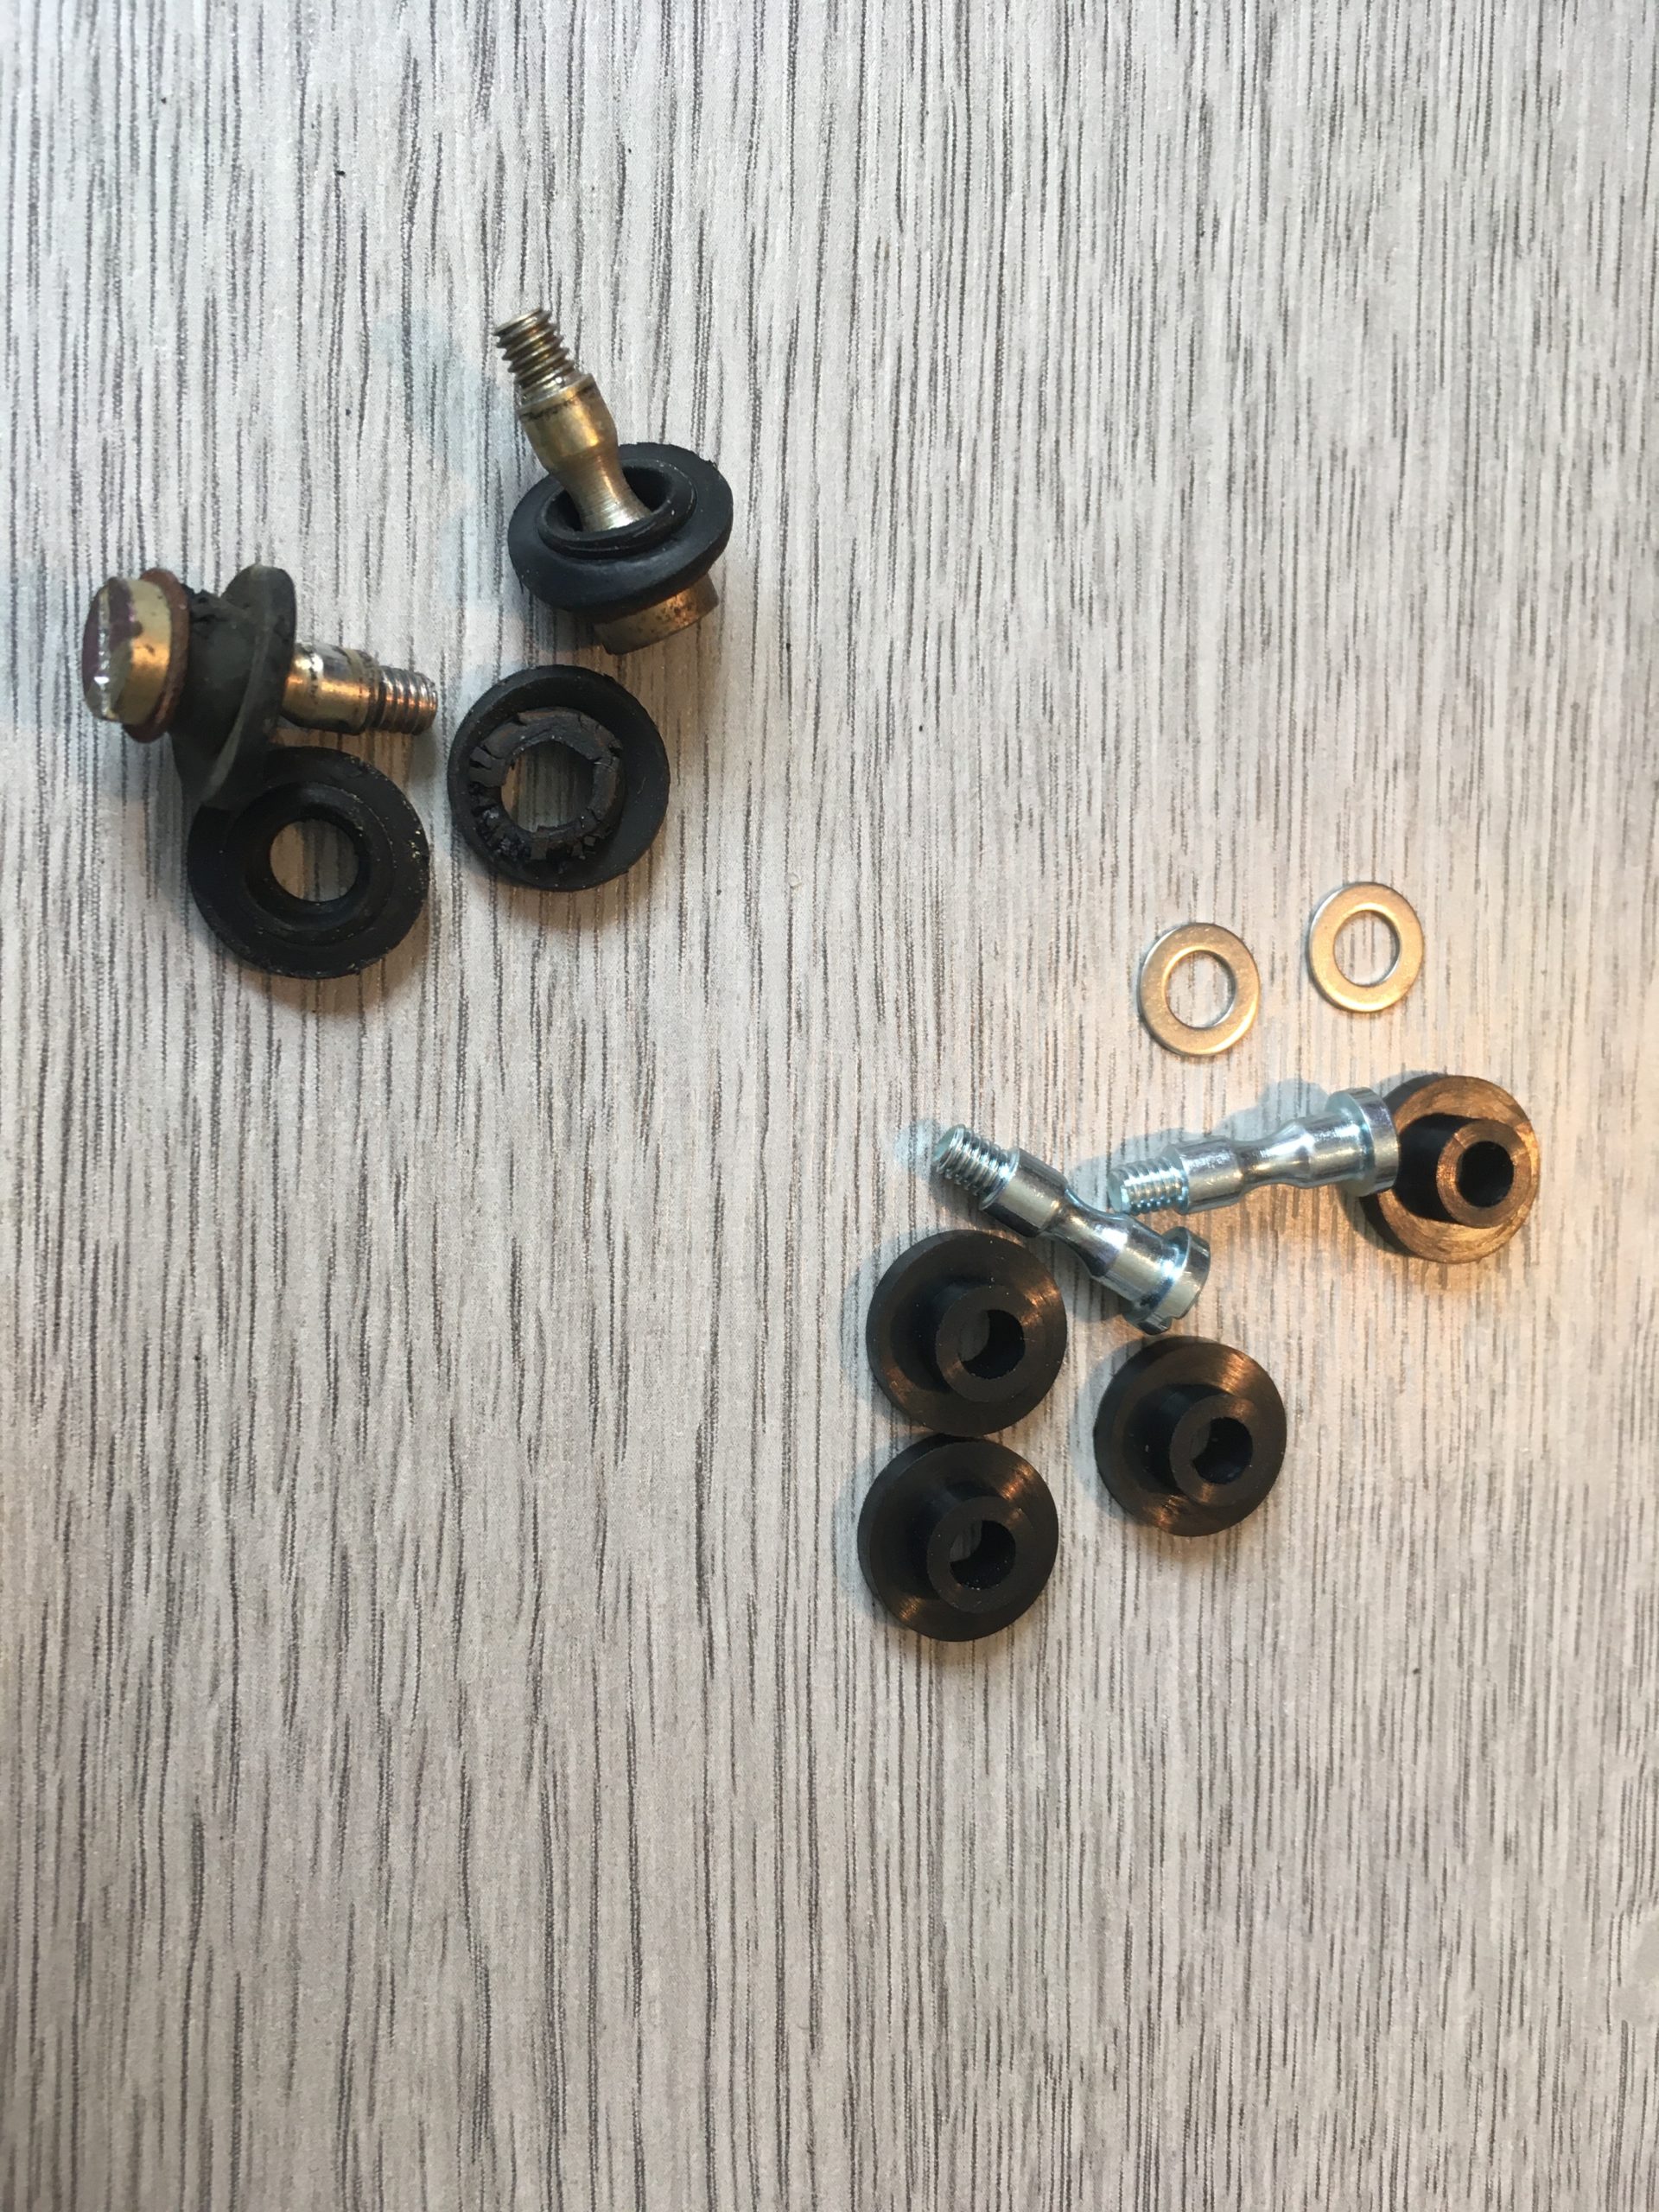
Old and new grommets
Over time, like many rubber components, these perish and eventually the metal of the speedometer shell, comes into contact with the mechanics of the unit. Some of these speedometers have a metal ring that can be unscrewed to allow access to the inside of the unit; needless to say, mine was crimped on.
I bought a set of three ‘grommet and bolt’ assemblies from a seller on eBay. I discovered I could carefully remove the old grommets, and install the new ones, through the hole where the speedometer illumination bulb assembly is fixed. It’s a bit fiddly, but saves potentially damaging the speedometer.
Petrol Tank Mounting Rubbers
These may not seem the most critical items, but when I removed the tank, I checked these and they were the 1966 originals and looked tired. The back of the tank was held on with some old purple padding and more inner tube. Said purple padding appeared to not be ethanol resistant…remember, they are adding booze to our petrol now.
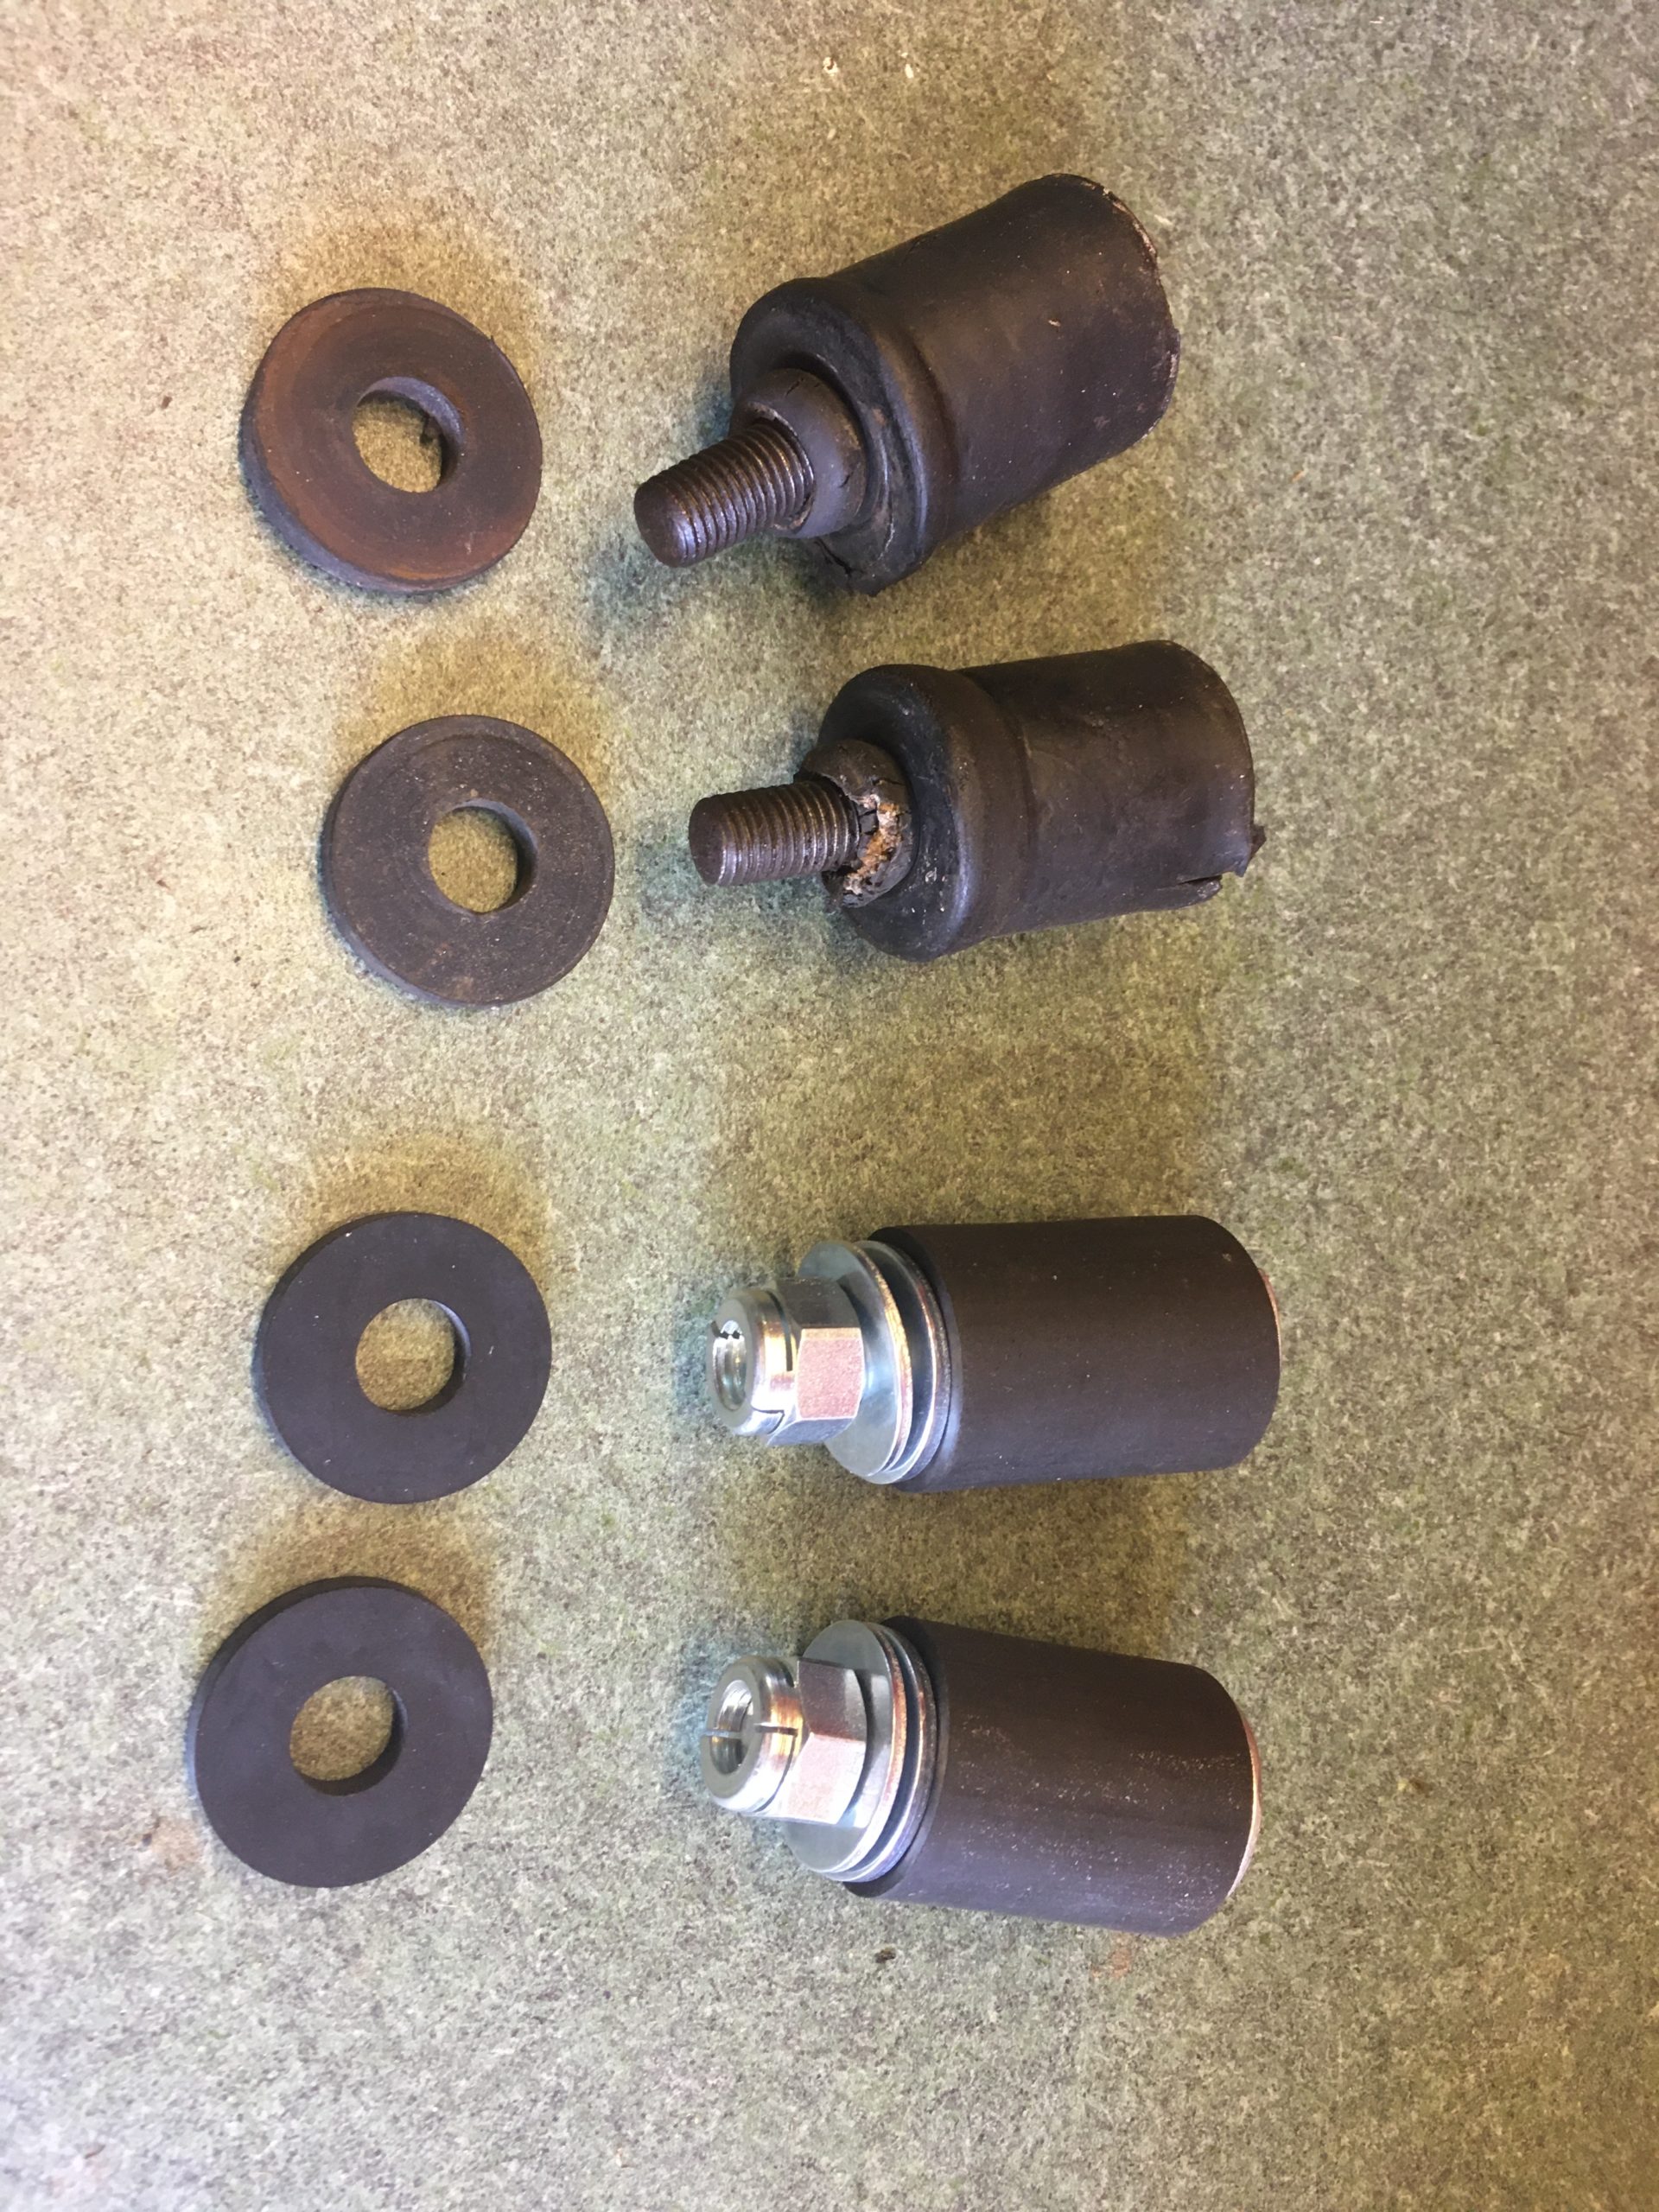
Petrol tank front mounts, old and new
I bought two new tank mounts and some foam padding from AMC and ended up with a much more secure mounting arrangement. I have since found a semicircular pad which fits at the seat end of the tank and can easily be glued to the frame. It’s neater than even the black foam option from AMC. Look on eBay for Norton Atlas Tank Rubber 06-2567; about four quid including postage.
When installing the new mounts, the rubber washers go INSIDE the hole in the tank, above the mount. This stops the mount top damaging the inside of the mounting hole. Make sure you’ve removed the old rubber washer before popping the new one in.