The 1966 Matchless G12 features an AMC ‘MA’ type gearbox and matching AMC multiplate clutch with bonded plates. The ‘A’ in ‘MA’ indicates that the box was produced with the kickstart spring modification first installed in 1962. The ‘M’ is for Matchless and AJS compatibility. Nortons used the ‘NA’ code for modified boxes, not introduced until 1964. The metal plates in the clutch have dimpled surfaces to help prevent them buckling when hot.
I now had my bike on the road and had been for a few local test rides; I always take things step by step and gradually increase my riding range. The bike performed fairly well, once I remembered that the choke lever needs to be turned what seems like ‘on’, to lift its slider out of the air stream. But I did notice that getting the bike into first gear at a standstill, with the engine running, was no easy task. It would pull away in second and from then onward it would go up and down the gears.
I’m guessing that you are thinking the clutch was dragging, as was I. The previous owner hadn’t addressed the wet sumping issues and told me the primary chain case would fill with oil if left standing long enough. He had also mentioned that first gear was sometimes tricky to engage. I did try rocking the bike back and forth, and letting the clutch in slightly whilst lifting the gear lever, but it really didn’t make much difference. Time to look inside the primary chain case, and here’s what I did. Remember that this is my solution…you are welcome to follow it entirely of your own volition.
Drain Old Oil
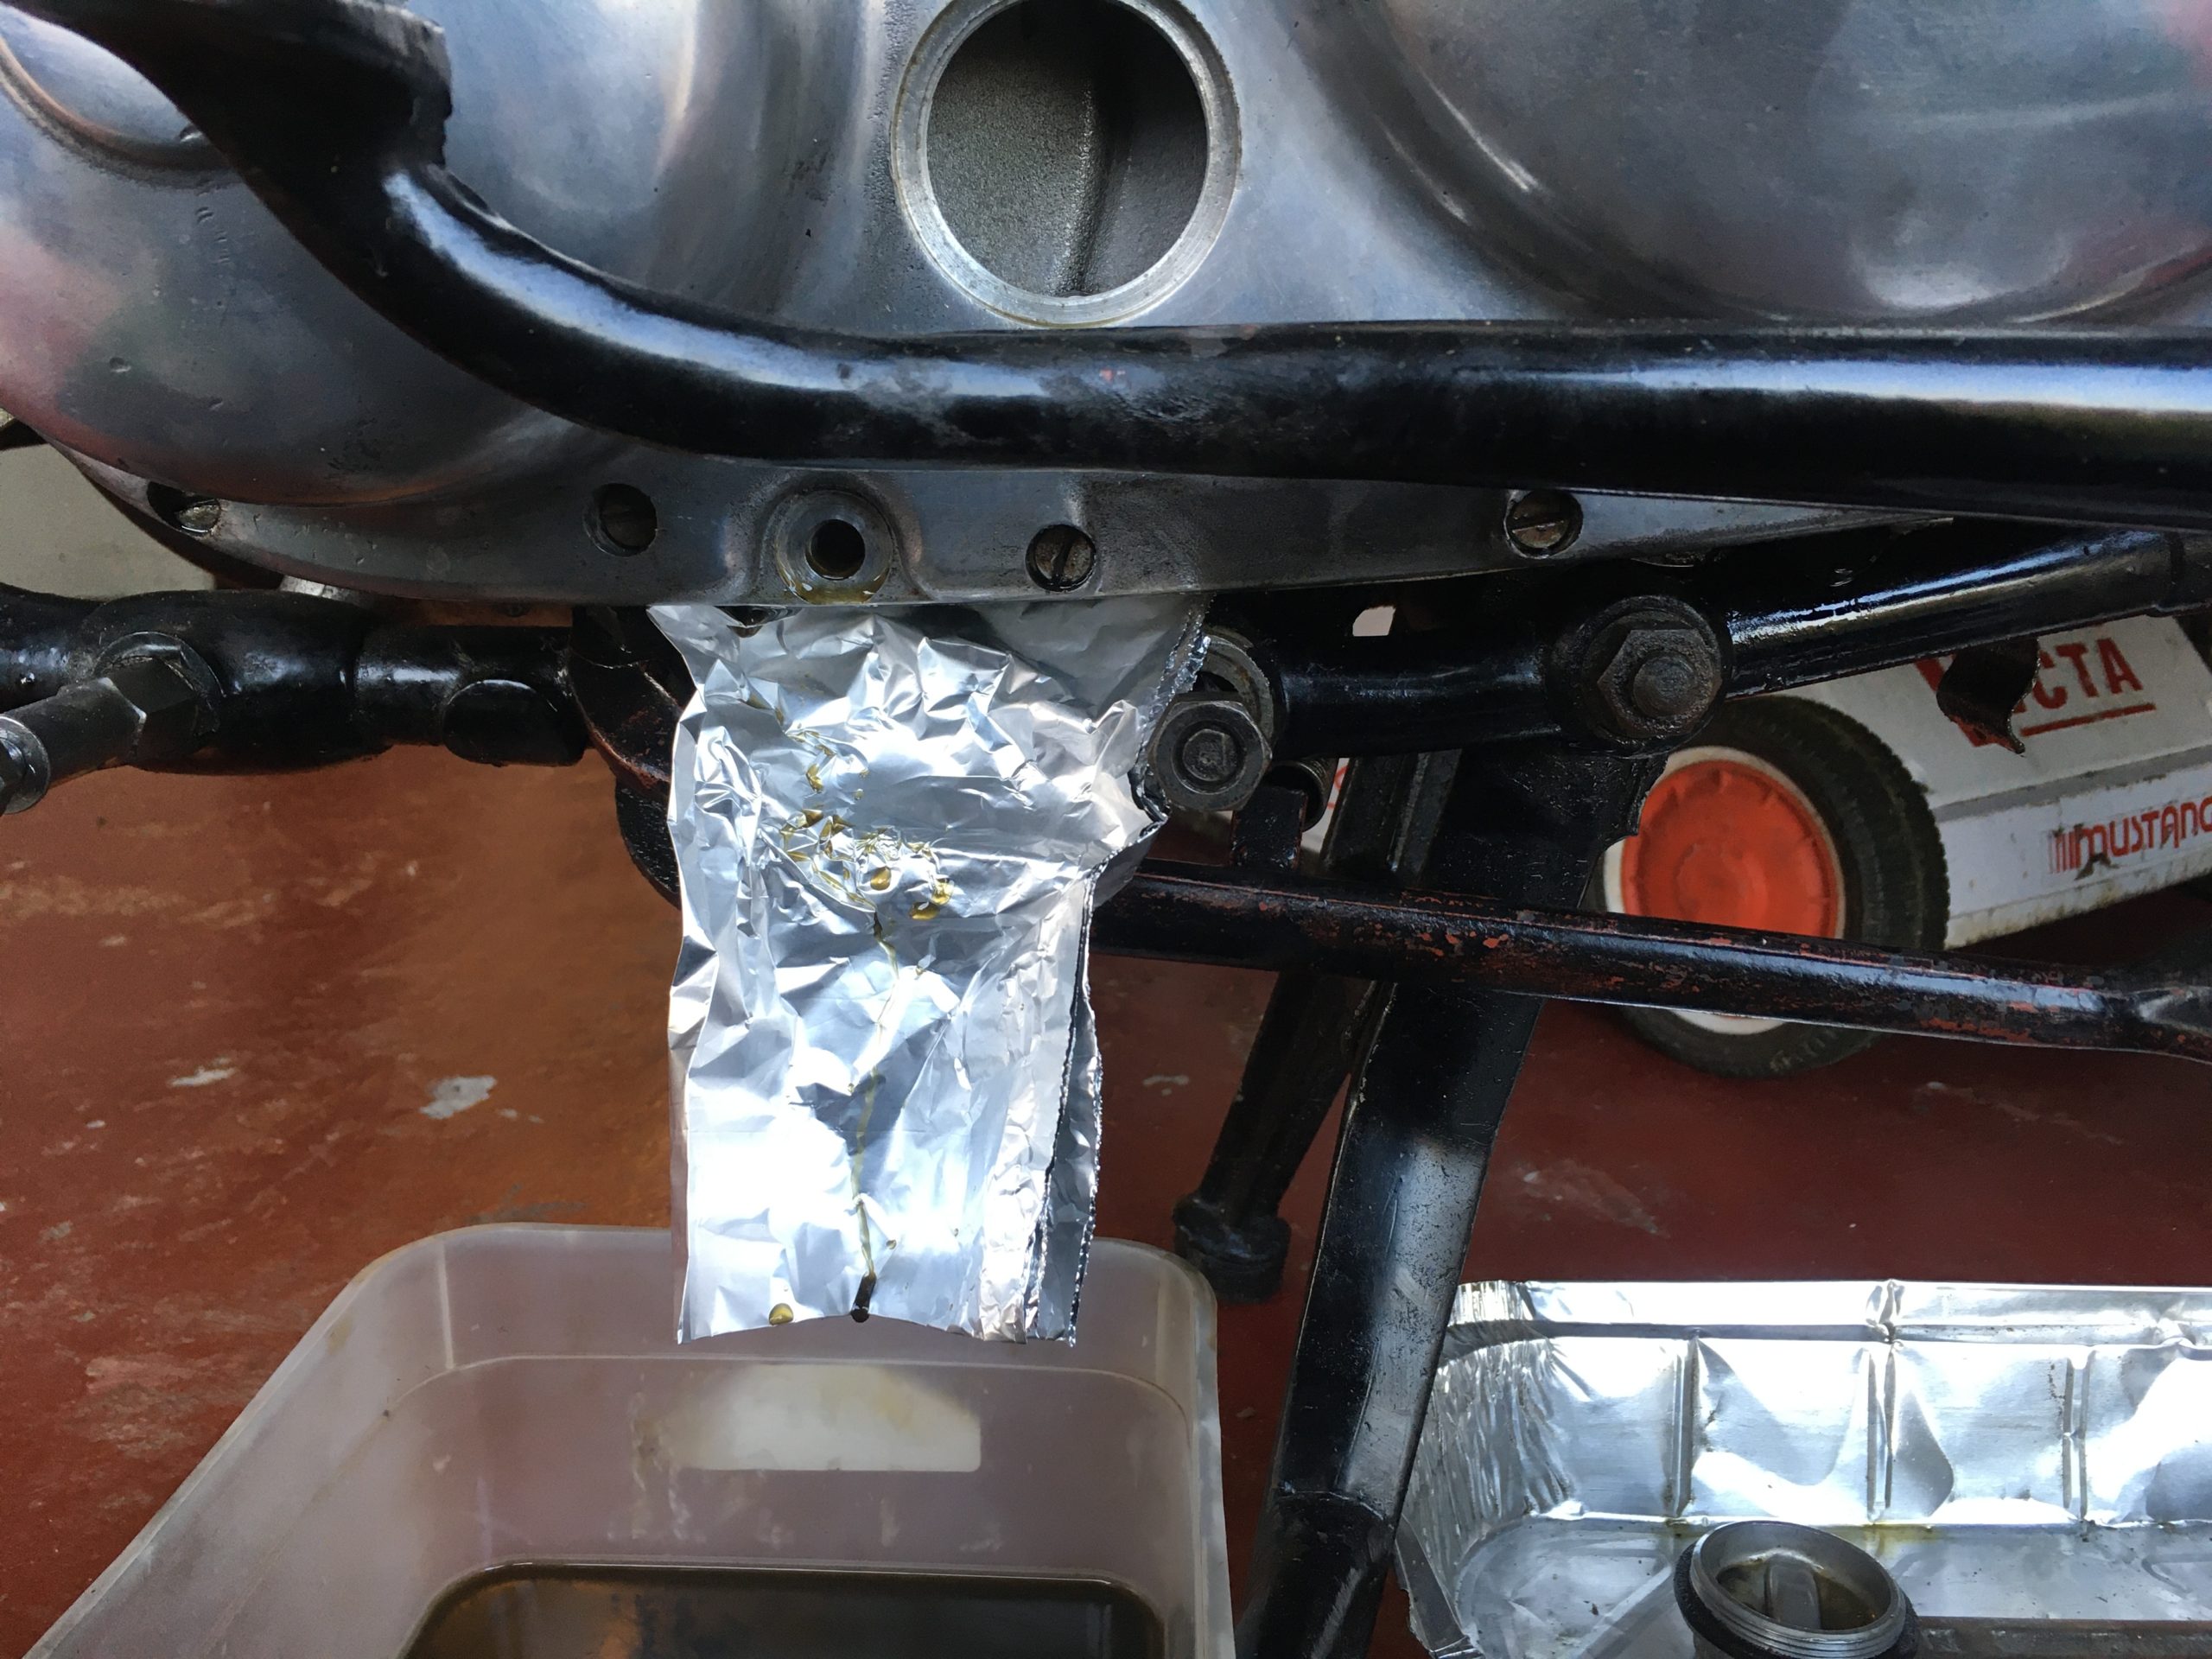
Pop the bike on its centre stand and put an old margarine tub or aluminium container under the lowest part of the chain case. Remove the port side exhaust pipe and silencer, followed by the port side foot rest. Use a bit of kitchen foil to make a gully for the oil from the drain plug, into the container. Remove the inspection and clutch adjustment covers, making sure you retain the leather seals. Then remove the drain plug and leave the bike for a few hours to drain. It’s a good idea to check the oil for unwanted particles such as metal or rubber.
Once drained, make sure you have sufficient containers under the chaincase to cover the full length; or plenty of absorbent tissues. Slacken off the rear brake adjuster at which point the brake light will come on; either disconnect the battery or remove the fuse which you should have installed. You could of course, just tie up the brake switch. Next, remove the fourteen screws that hold the cover in place and just, only just, break the cover seal. A bit more oil will run out at this stage.
Remove Outer Cover – see post
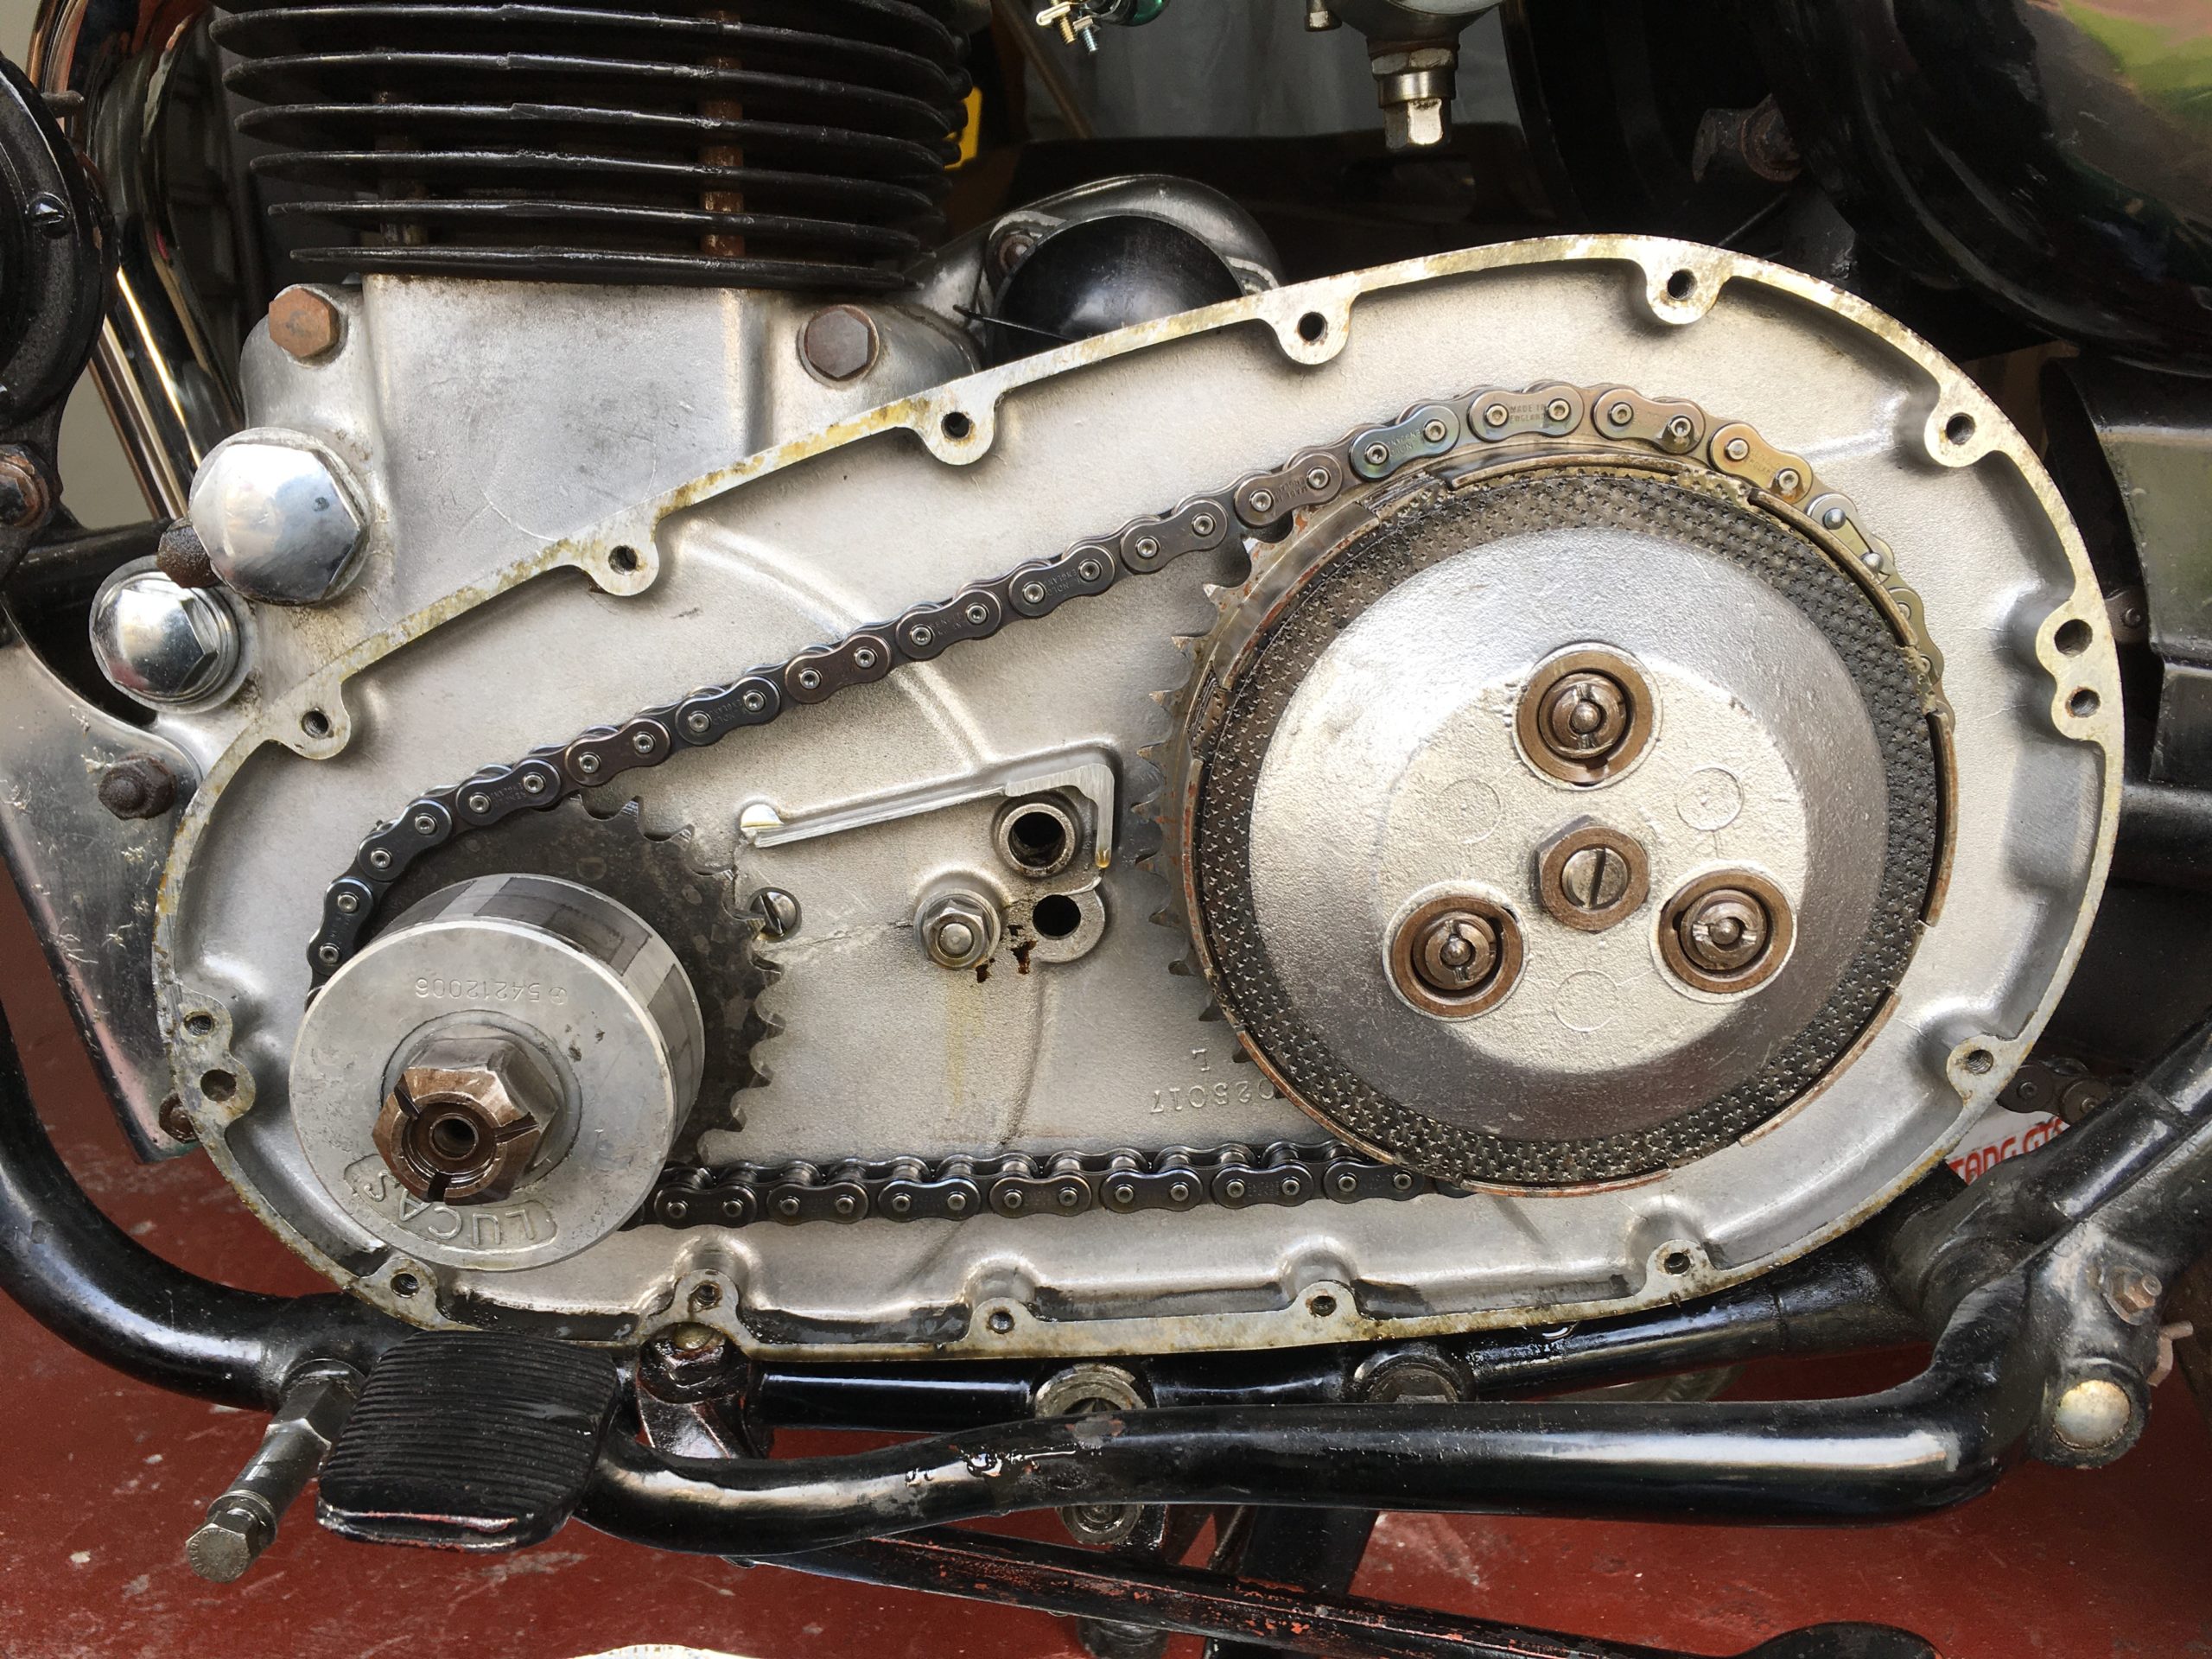
Next, remove the clip on cover from over the top of the gearbox and disconnect the three bullet connectors on the cable to the alternator stator, housed in the primary chaincase. You can now slowly pull the outer chain case cover away from the inner one. Note: feed the cable through the shrouded hole in the inner chaincase cover as you pull the outer cover away. You will need to depress the rear brake pedal to give enough clearance to remove the cover.
If the outer cover is ‘stuck’, first be sure you’ve removed ALL of the screws, and the centre bolt if you have an older bike. If you have, there are two dowels to locate the outer cover correctly; they sometimes get gummed up. You will need to carefully used a clean thin plastic wedge or putty knife, to slowly part the outer cover from the inner. The dowels are at the extreme left and right of the outer cover.
Once removed, discard the original gasket…unless you don’t have a new one and the old one is in excellent condition. At this point I cleaned the remaining oil and sludge out of the chain case, then cleaned the residue of old sealant from the mating surfaces of the chain case halves.
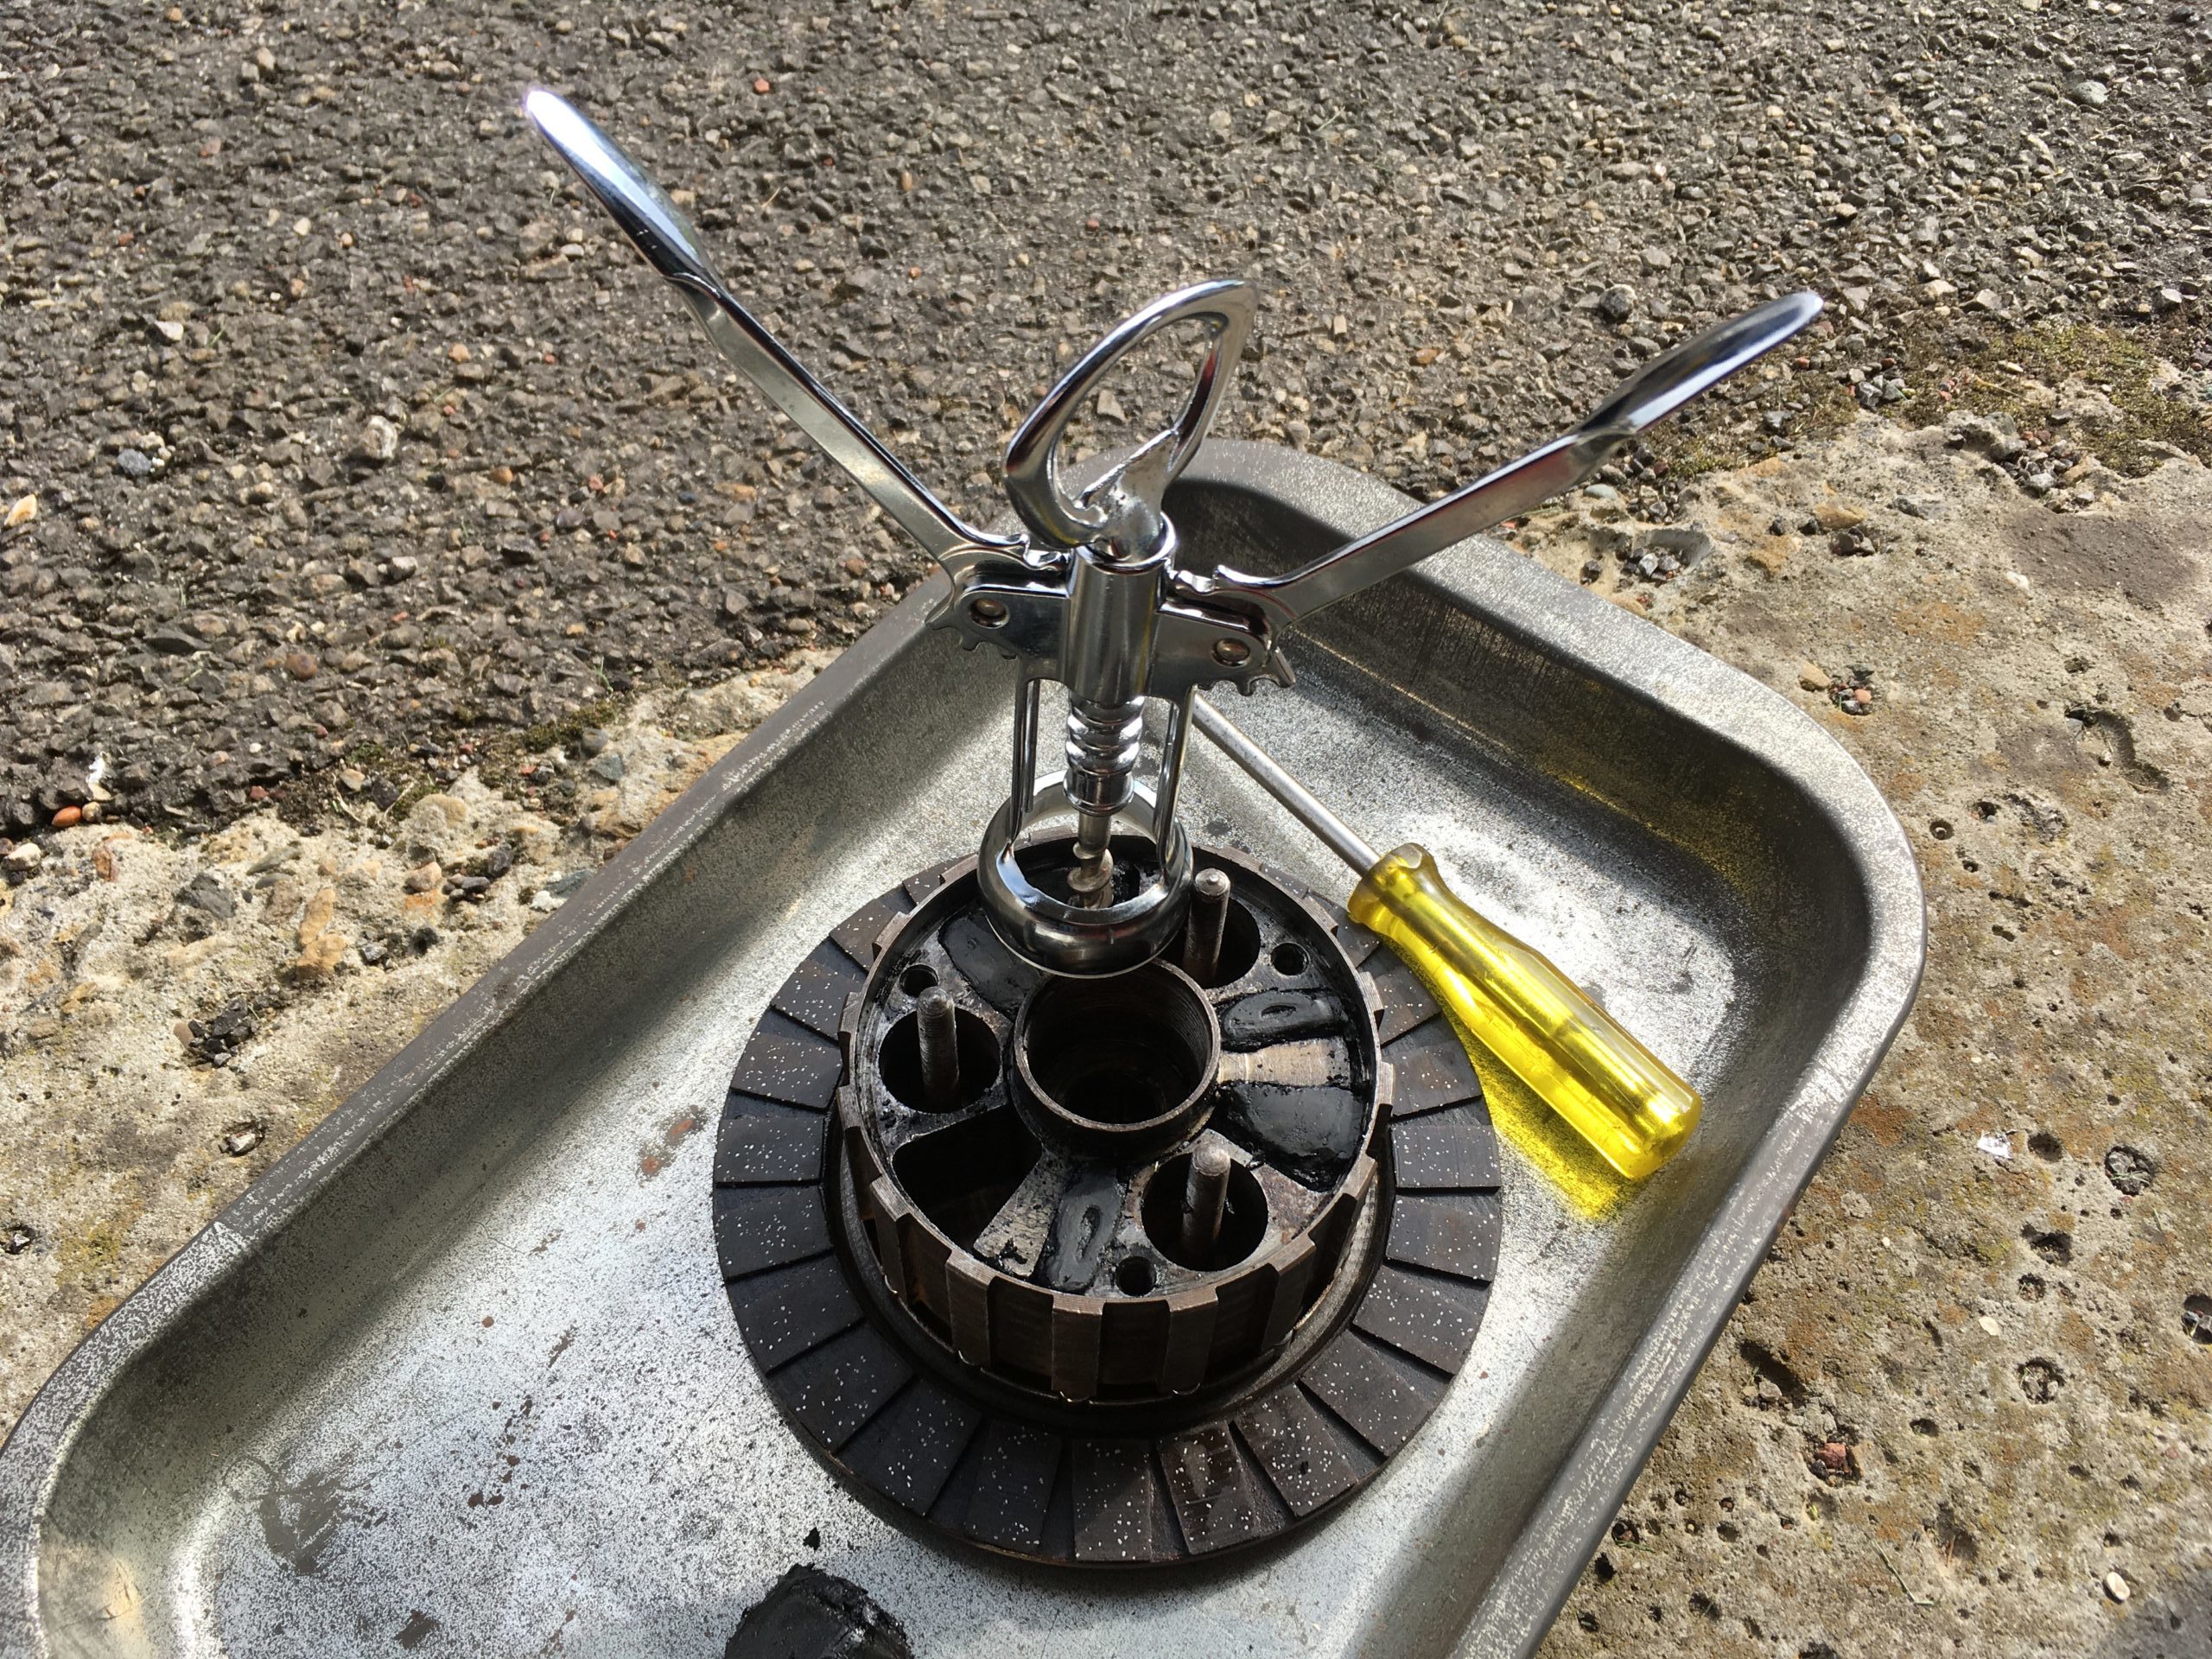
Plates Removed
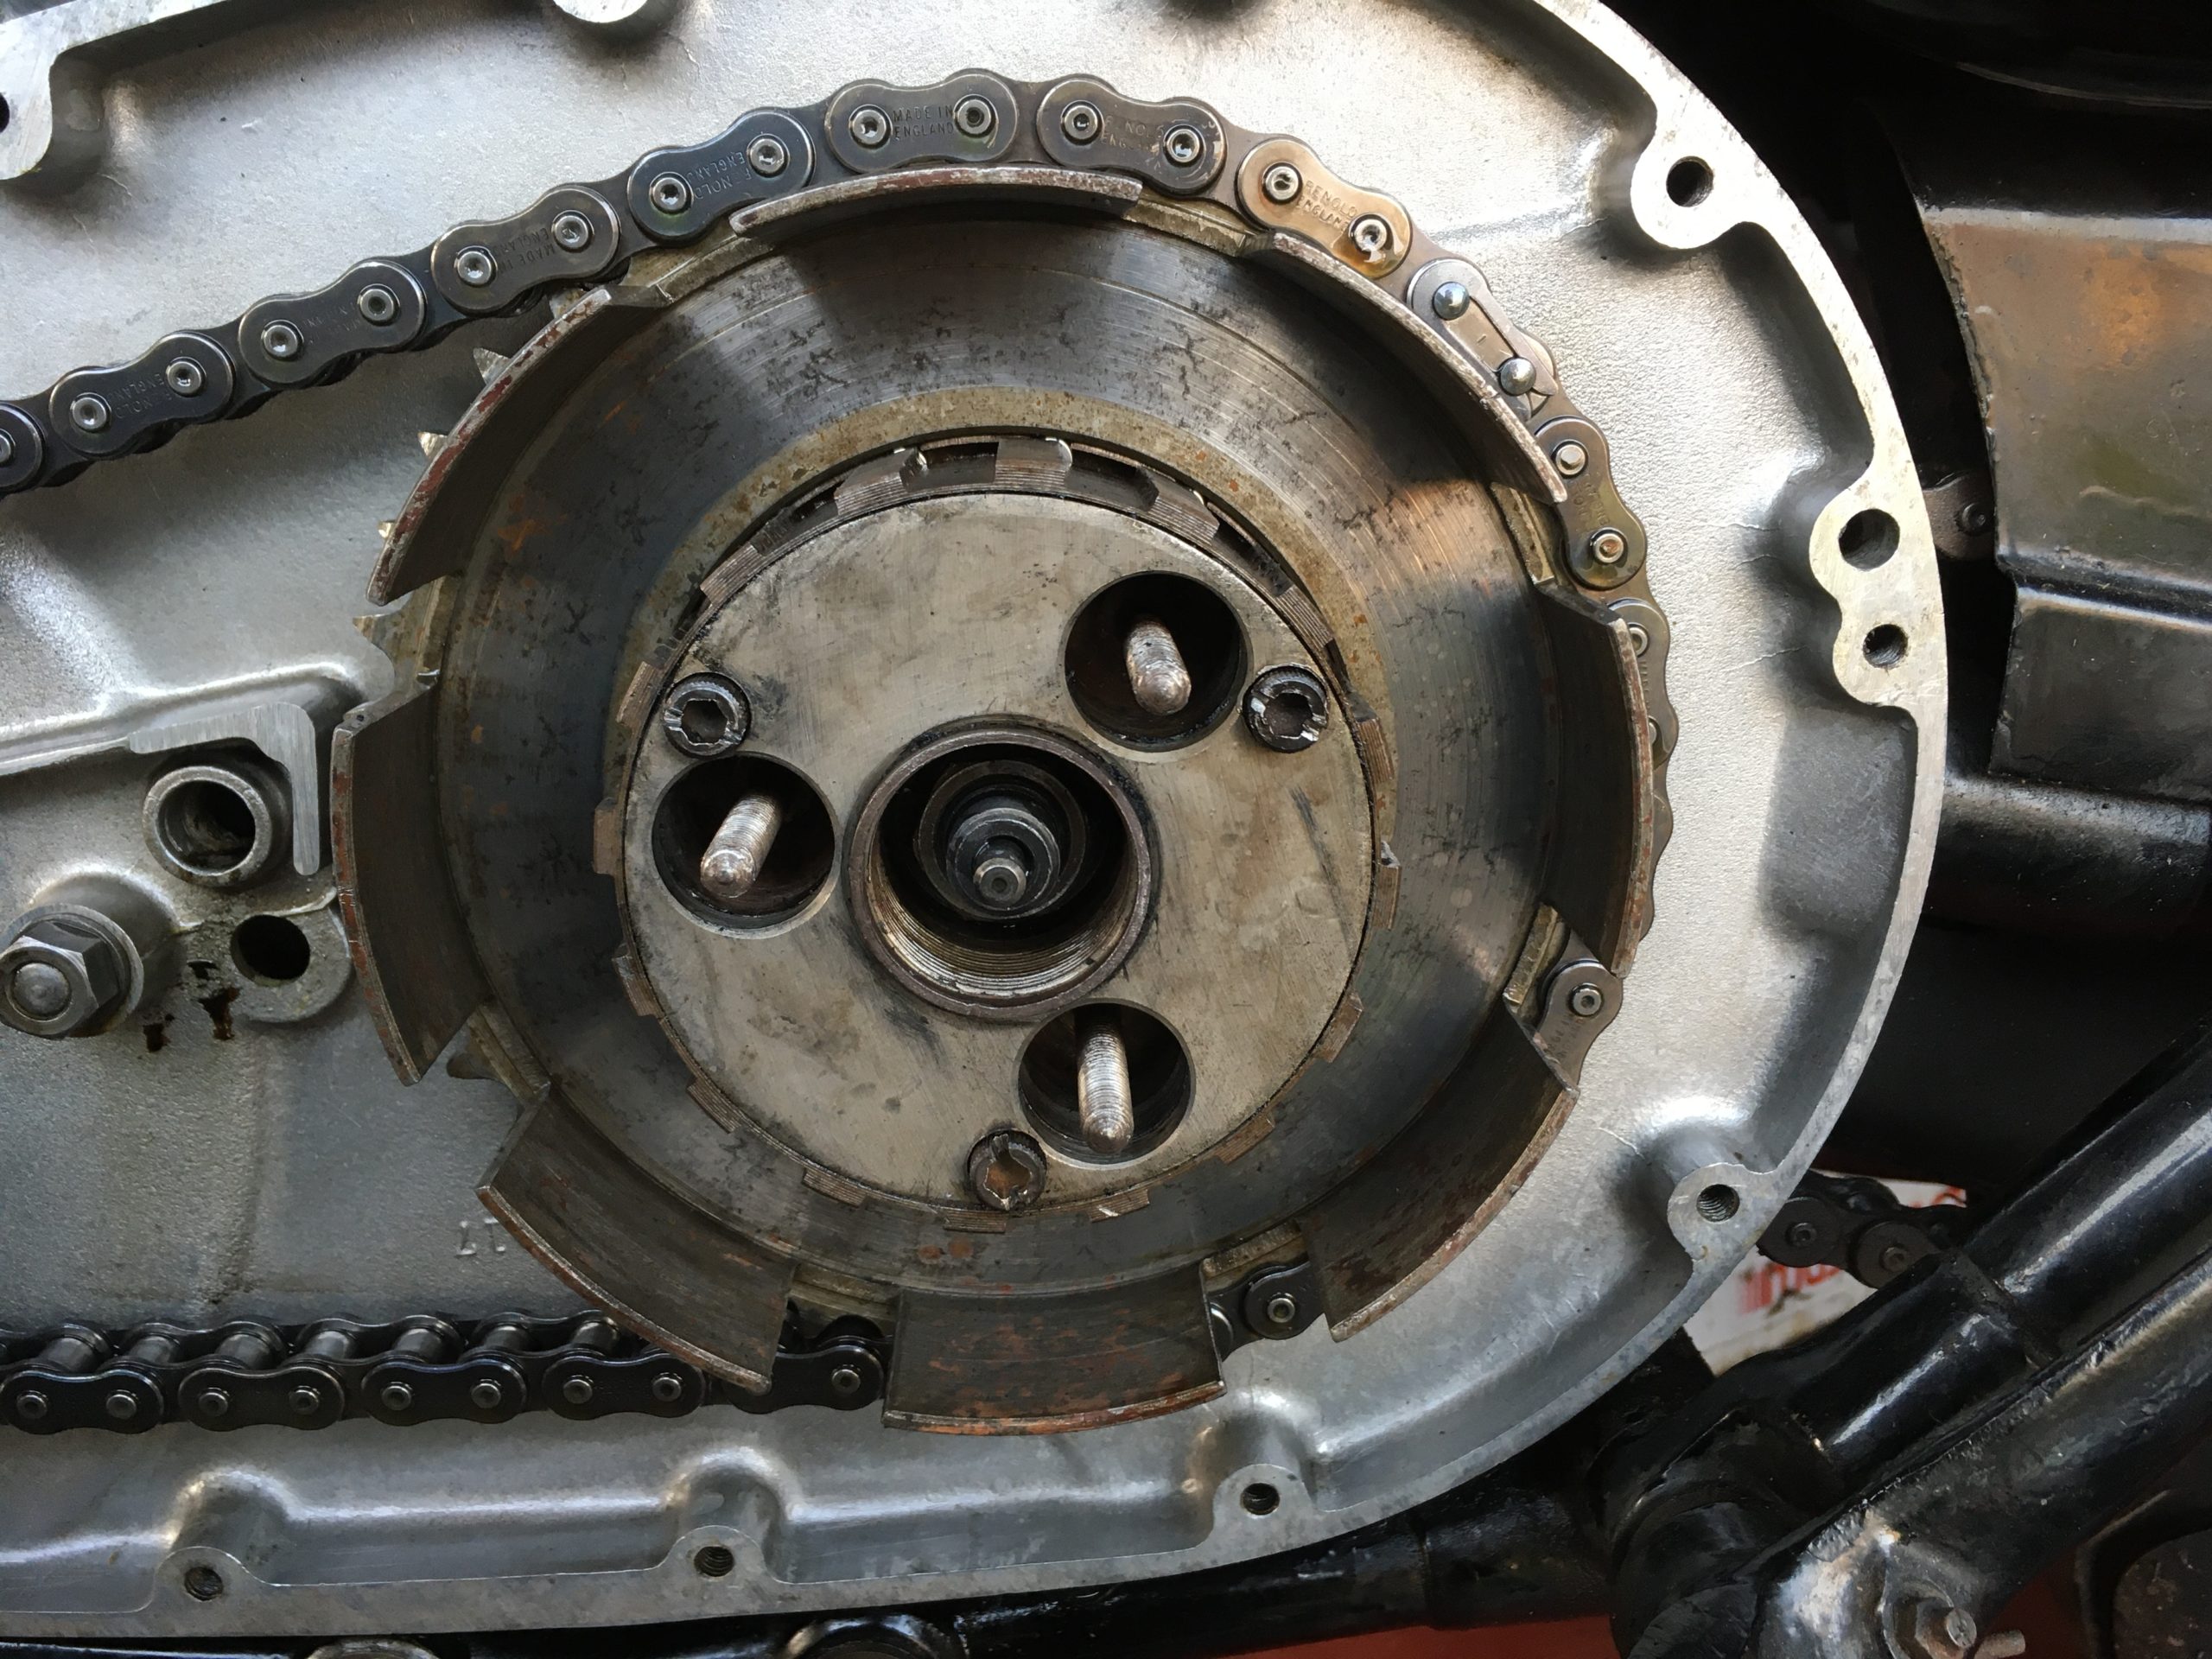
Slacken off the clutch cable adjuster at the gearbox end. Remove the clutch adjuster and lock nut from the clutch pressure plate, followed by the three spring adjusters. Remove the adjusters, springs and cups and place to one side, after checking the parts for damage and ensuring that the springs are all the same length. Remove the pressure plate, driven and friction plates, noting the order in which they were installed.
Next, remove the removable link from the chain; you may need to remove the spark plugs and turn the engine until the link is at the top or bottom, in the deepest part of the chain case. Carefully set the chain aside. You can now also remove the clutch basket, leaving the centre in place. Now remove the three shock absorber cover screws; some are countersunk screws, other are Allen Bolts, like mine. My cover screws had screwdriver slots cut into them with a hacksaw…and were barely finger tight. The cover plate on mine was covered in a nasty black substance which would shortly show its hand. You now need to persuade and prise gently, the cover off the centre. Be careful not to damage anything.
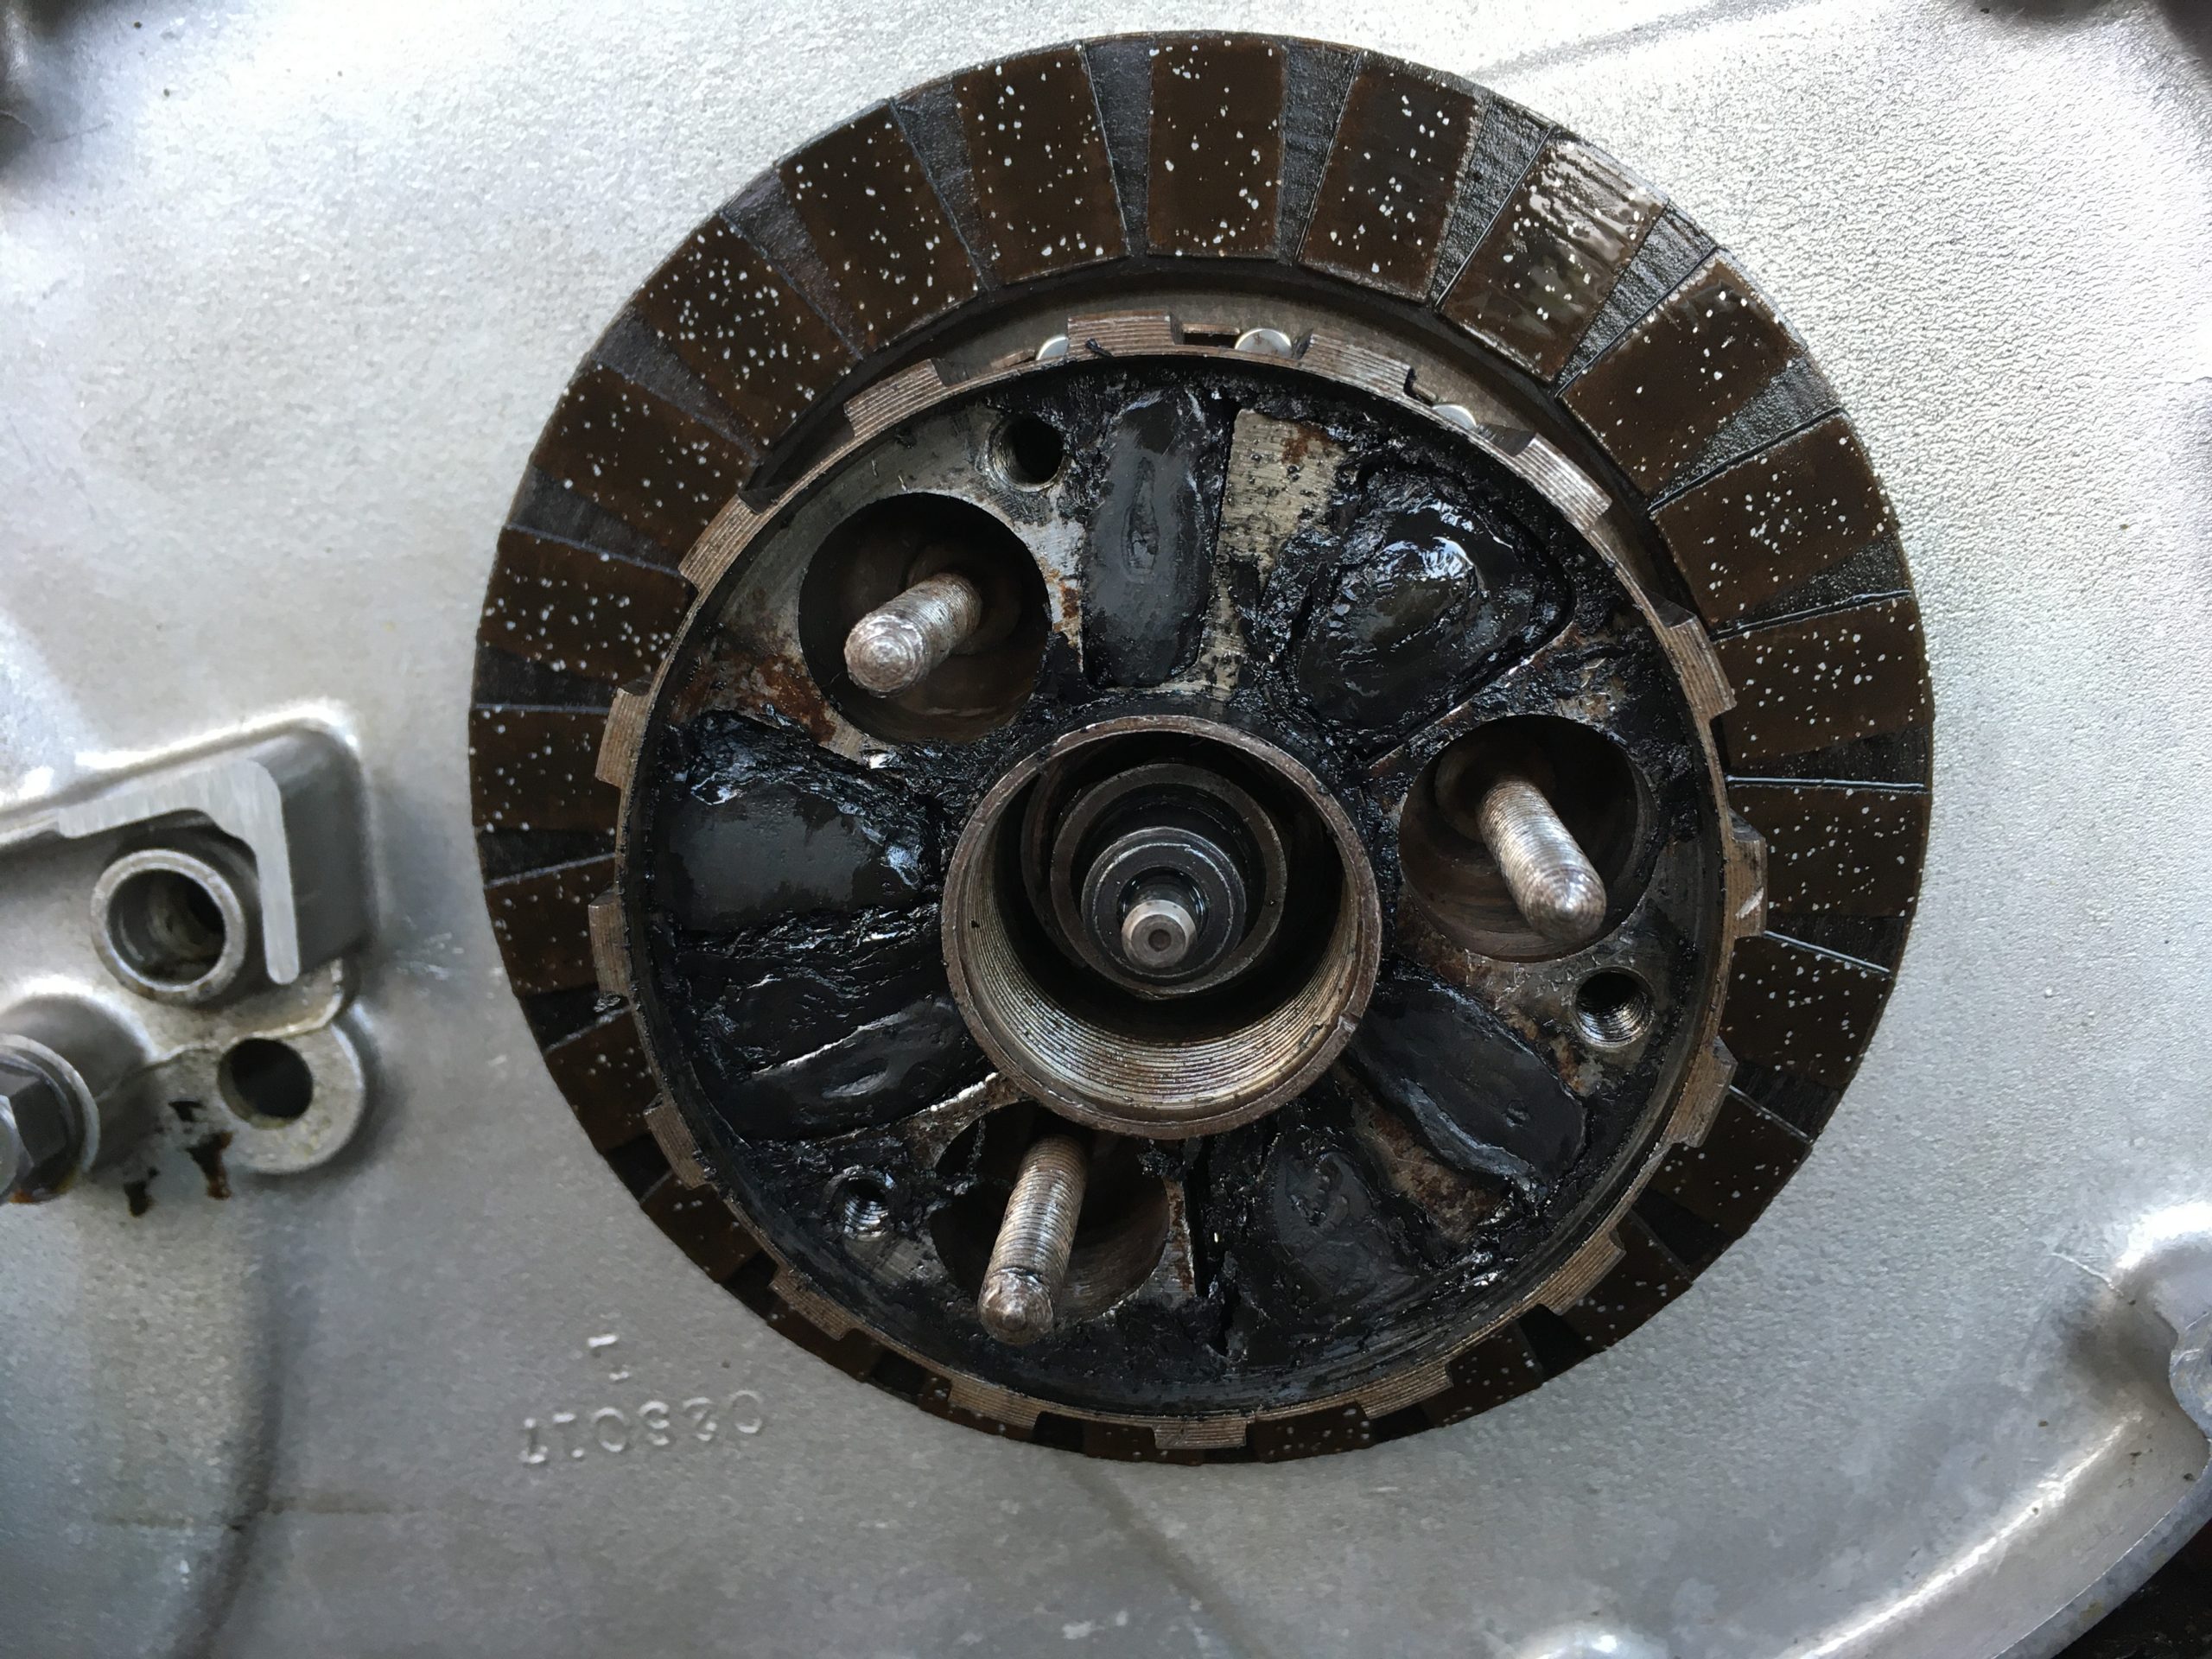
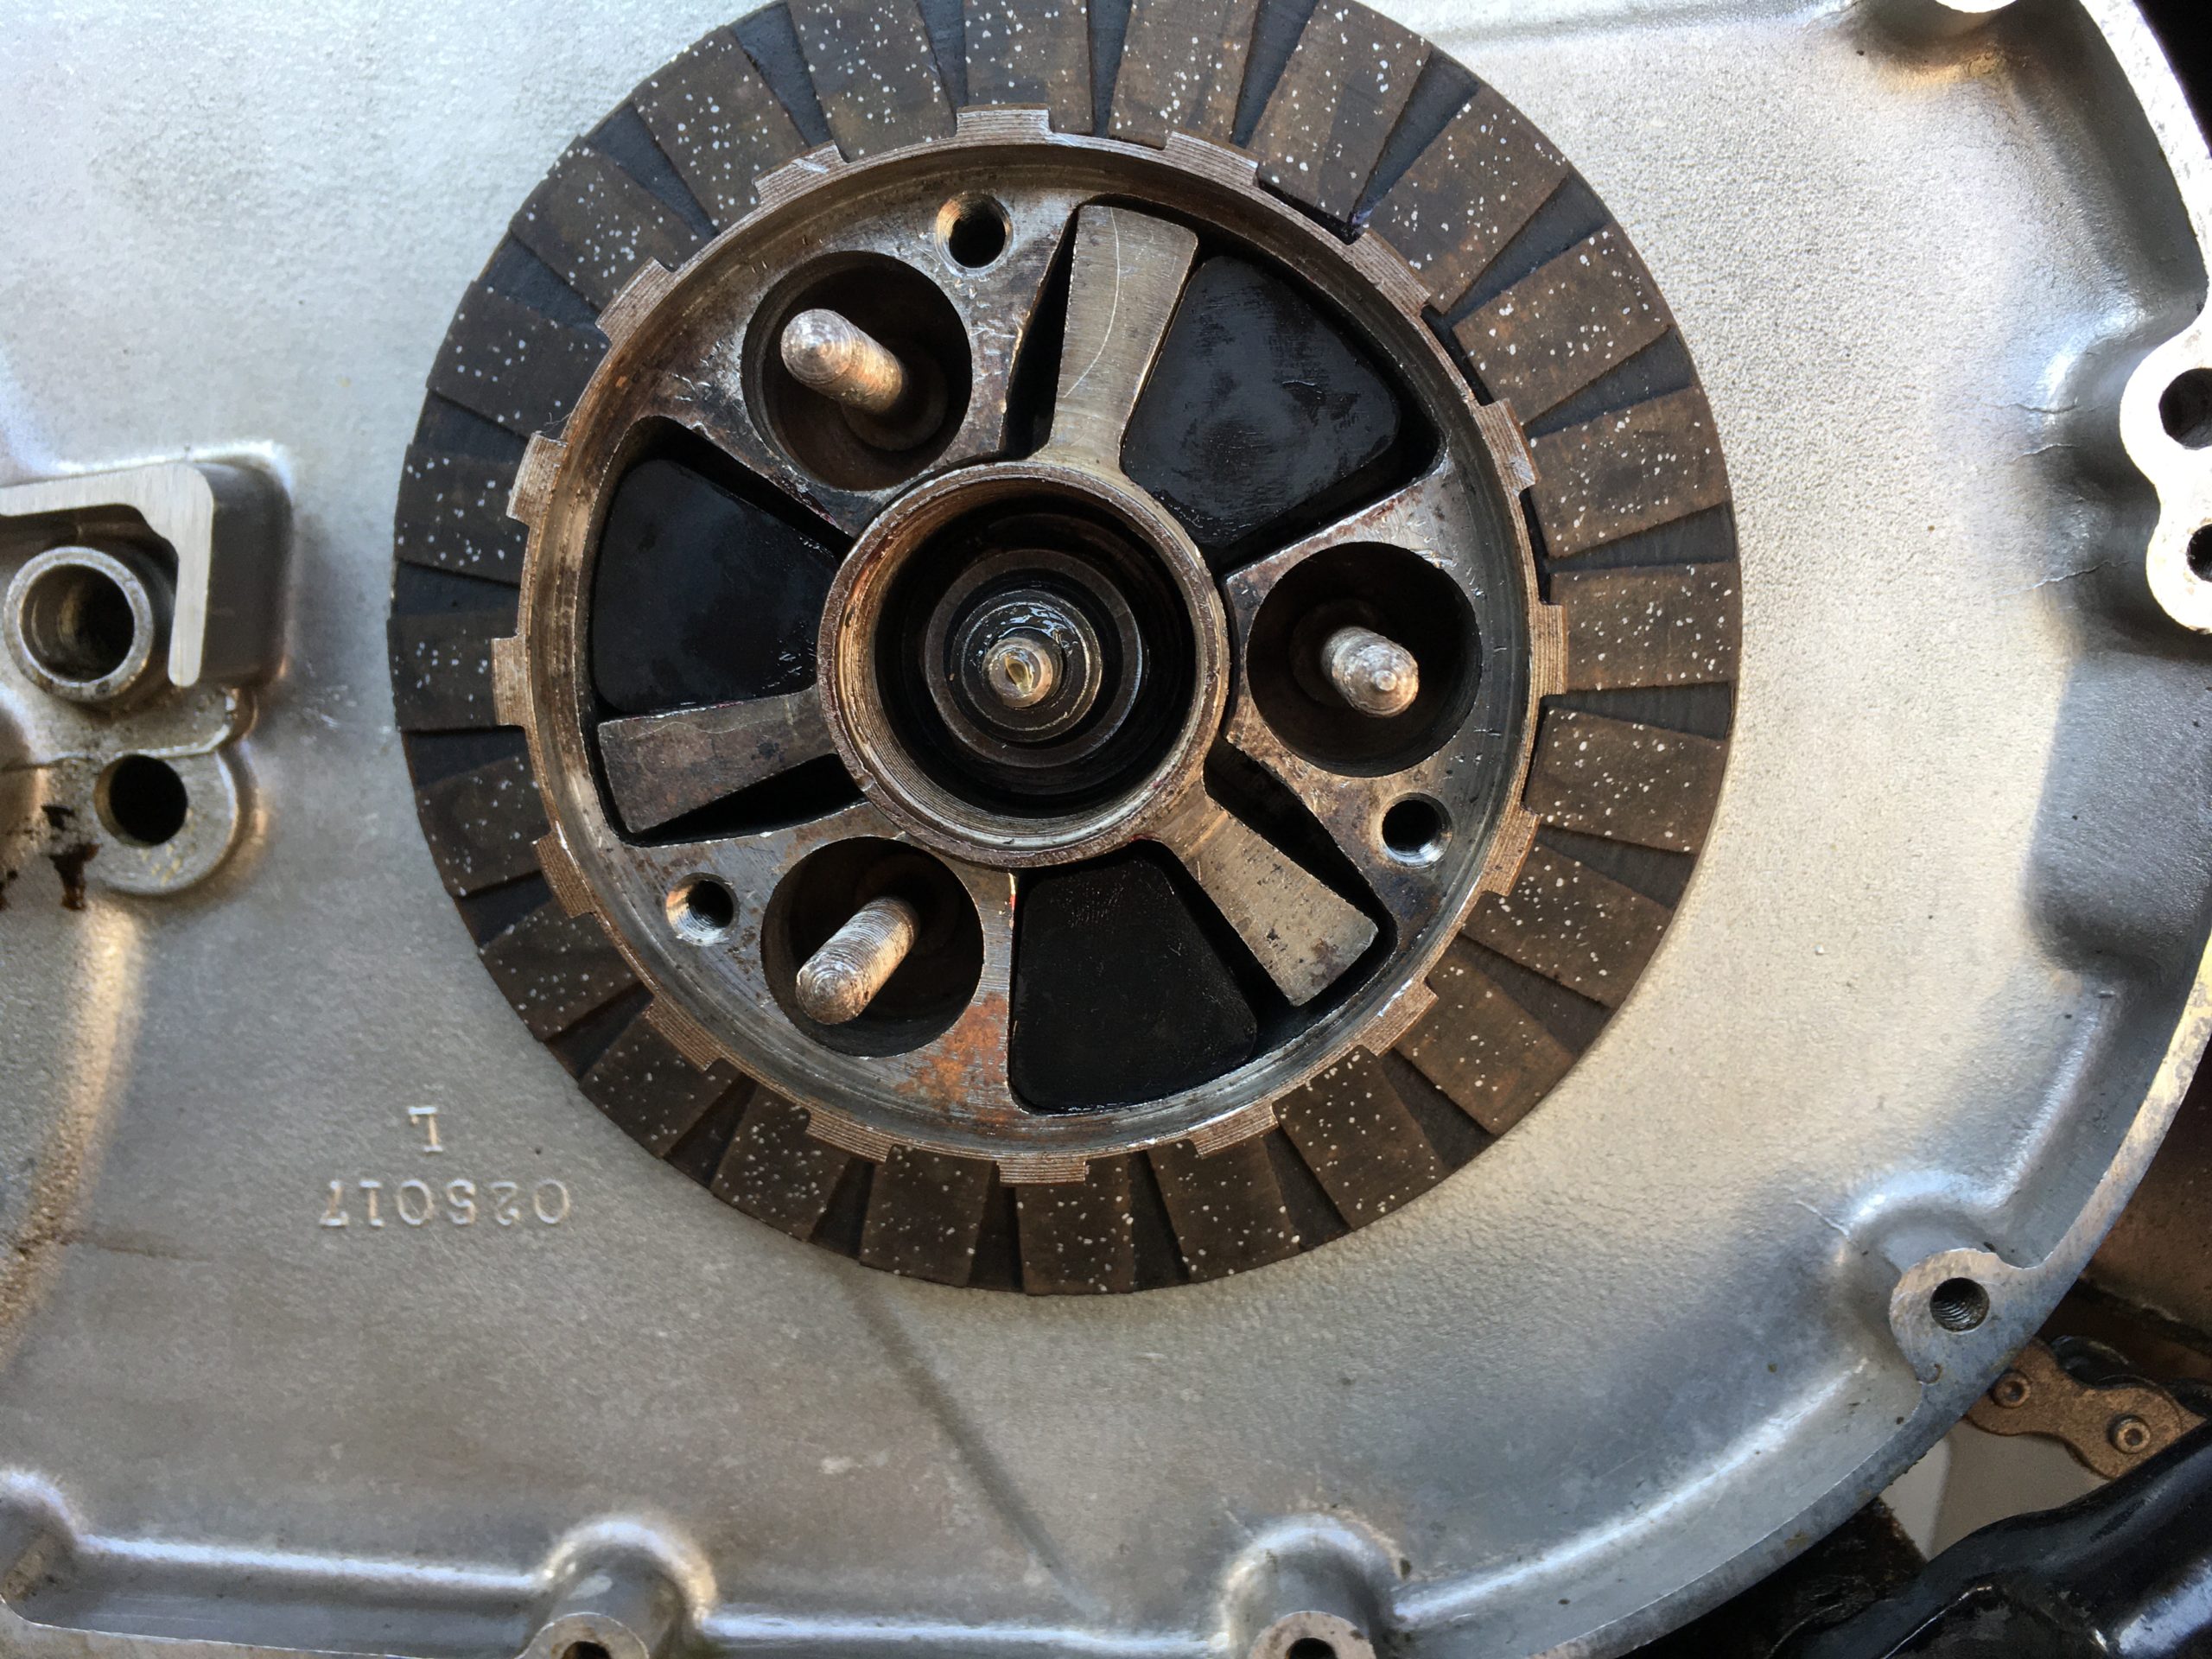
Shock Absorber Cover Removed – Nasty
Once removed, you should see the six shock absorber rubbers…three thick ones for absorbing the engagement of drive, and three thin ones to deal with rebound. The six on my clutch had melted in the past, and the rubber had seeped into all the gaps. I ordered a set of British made ones from Steve at AMC Classic Spares; these are a little more than twice the £5-00 the standard ones are, but they are more supple and worth a few extra pounds (part number 040386/7). You will also need the clutch locking tool, also available from Steve, the owners club, Andover Norton and others. It’s used to remove and reinstall the shock absorber rubbers…except melted ones.
Under normal circumstances, you fit the lock tool around the clutch centre, apply the back brake with the bike in top gear, then push anticlockwise on the locking tool to compress the thick shock absorber rubbers. You should then be able to remove the thin rubbers easily. I found the clutch locking tool needed a piece of pipe to extend the handle to get more ‘purchase’ and to stop it hurting my hand.
Then remove the main clutch centre nut…it’s the same size as a spark plug. It should be tight…mine wasn’t even finger tight and the clutch had been able to wobble. There’s a split lock washer under the nut…don’t lose it.
Custom Extractor In Use
I used a highly specialised tool to remove the melted thick rubbers first, followed by the thin ones; make sure you get the lever type with handles. Once out, clean all the gunge and rubber residue off the clutch centre parts, then clean and inspect the driven and friction plates, plus all other components. Ensure the caged roller bearing at the back of the clutch centre is in good condition. If it isn’t, you’ll need to undo the three nuts on the back of the clutch centre to remove the bolts. When you replace these, make sure you centre pop the bolt / nut thread to stop the nuts coming off.
Thoroughly clean all the parts then wipe them with an oily rag…the friction and driven plates need to be cleaned but oil free, i.e. not wiped with an oily rag. Use proper brake and clutch cleaner in a well ventilated space; don’t use petrol as it leaves a residue.
Check the clutch actuator rod isn’t worn or damaged and that it’s free to turn and move in and out. Examine the gearbox mainshaft splines and all other accessible parts for damage.
It goes without saying, replace anything that is damaged or even suspect.
Reassembly is unsurprisingly the reverse of the procedure. The manual says to put a little ‘anti centrifuge grease’ on the cage roller bearing rollers; I couldn’t find anything like that so decided Lucas ‘Red and Tacky’ grease would do the job.
Clutch Centre Back on Bike
Install the clutch centre parts, then the lock washer and centre nut. Apply the back brake and tighten to around 60 ft lb; use a little Loctite if you are concerned. Smear all the new shock absorber rubbers with Red Rubber Grease, insert the thick rubbers and note the shape of the cavities for the thin rubbers. Use the locking tool, apply the back brake, compress the thick rubbers and carefully push in the thin ones, ensuring they are installed to match the shape of the cavities. Put the cover plate in place and tighten up the three screws. Then install the basket (make sure it’s seated properly on the caged roller bearing) and clutch plates, finally the pressure plate, cups, springs and adjusters. Note: you did check the springs were the same length? If in doubt, replace all three and any other suspect parts. The adjusters should be screwed in until their tops are level with the tops of the spring cups. Next install the clutch adjuster screw and lock nut. Turn the centre screw clockwise until you just feel some resistance, then back it off half a turn. Tighten the lock nut, making sure the centre screw doesn’t move. If this isn’t done properly, the pressure on the actuator rod can cause it to heat up, lose its case hardening and wear away…necessitating frequent clutch adjustment.
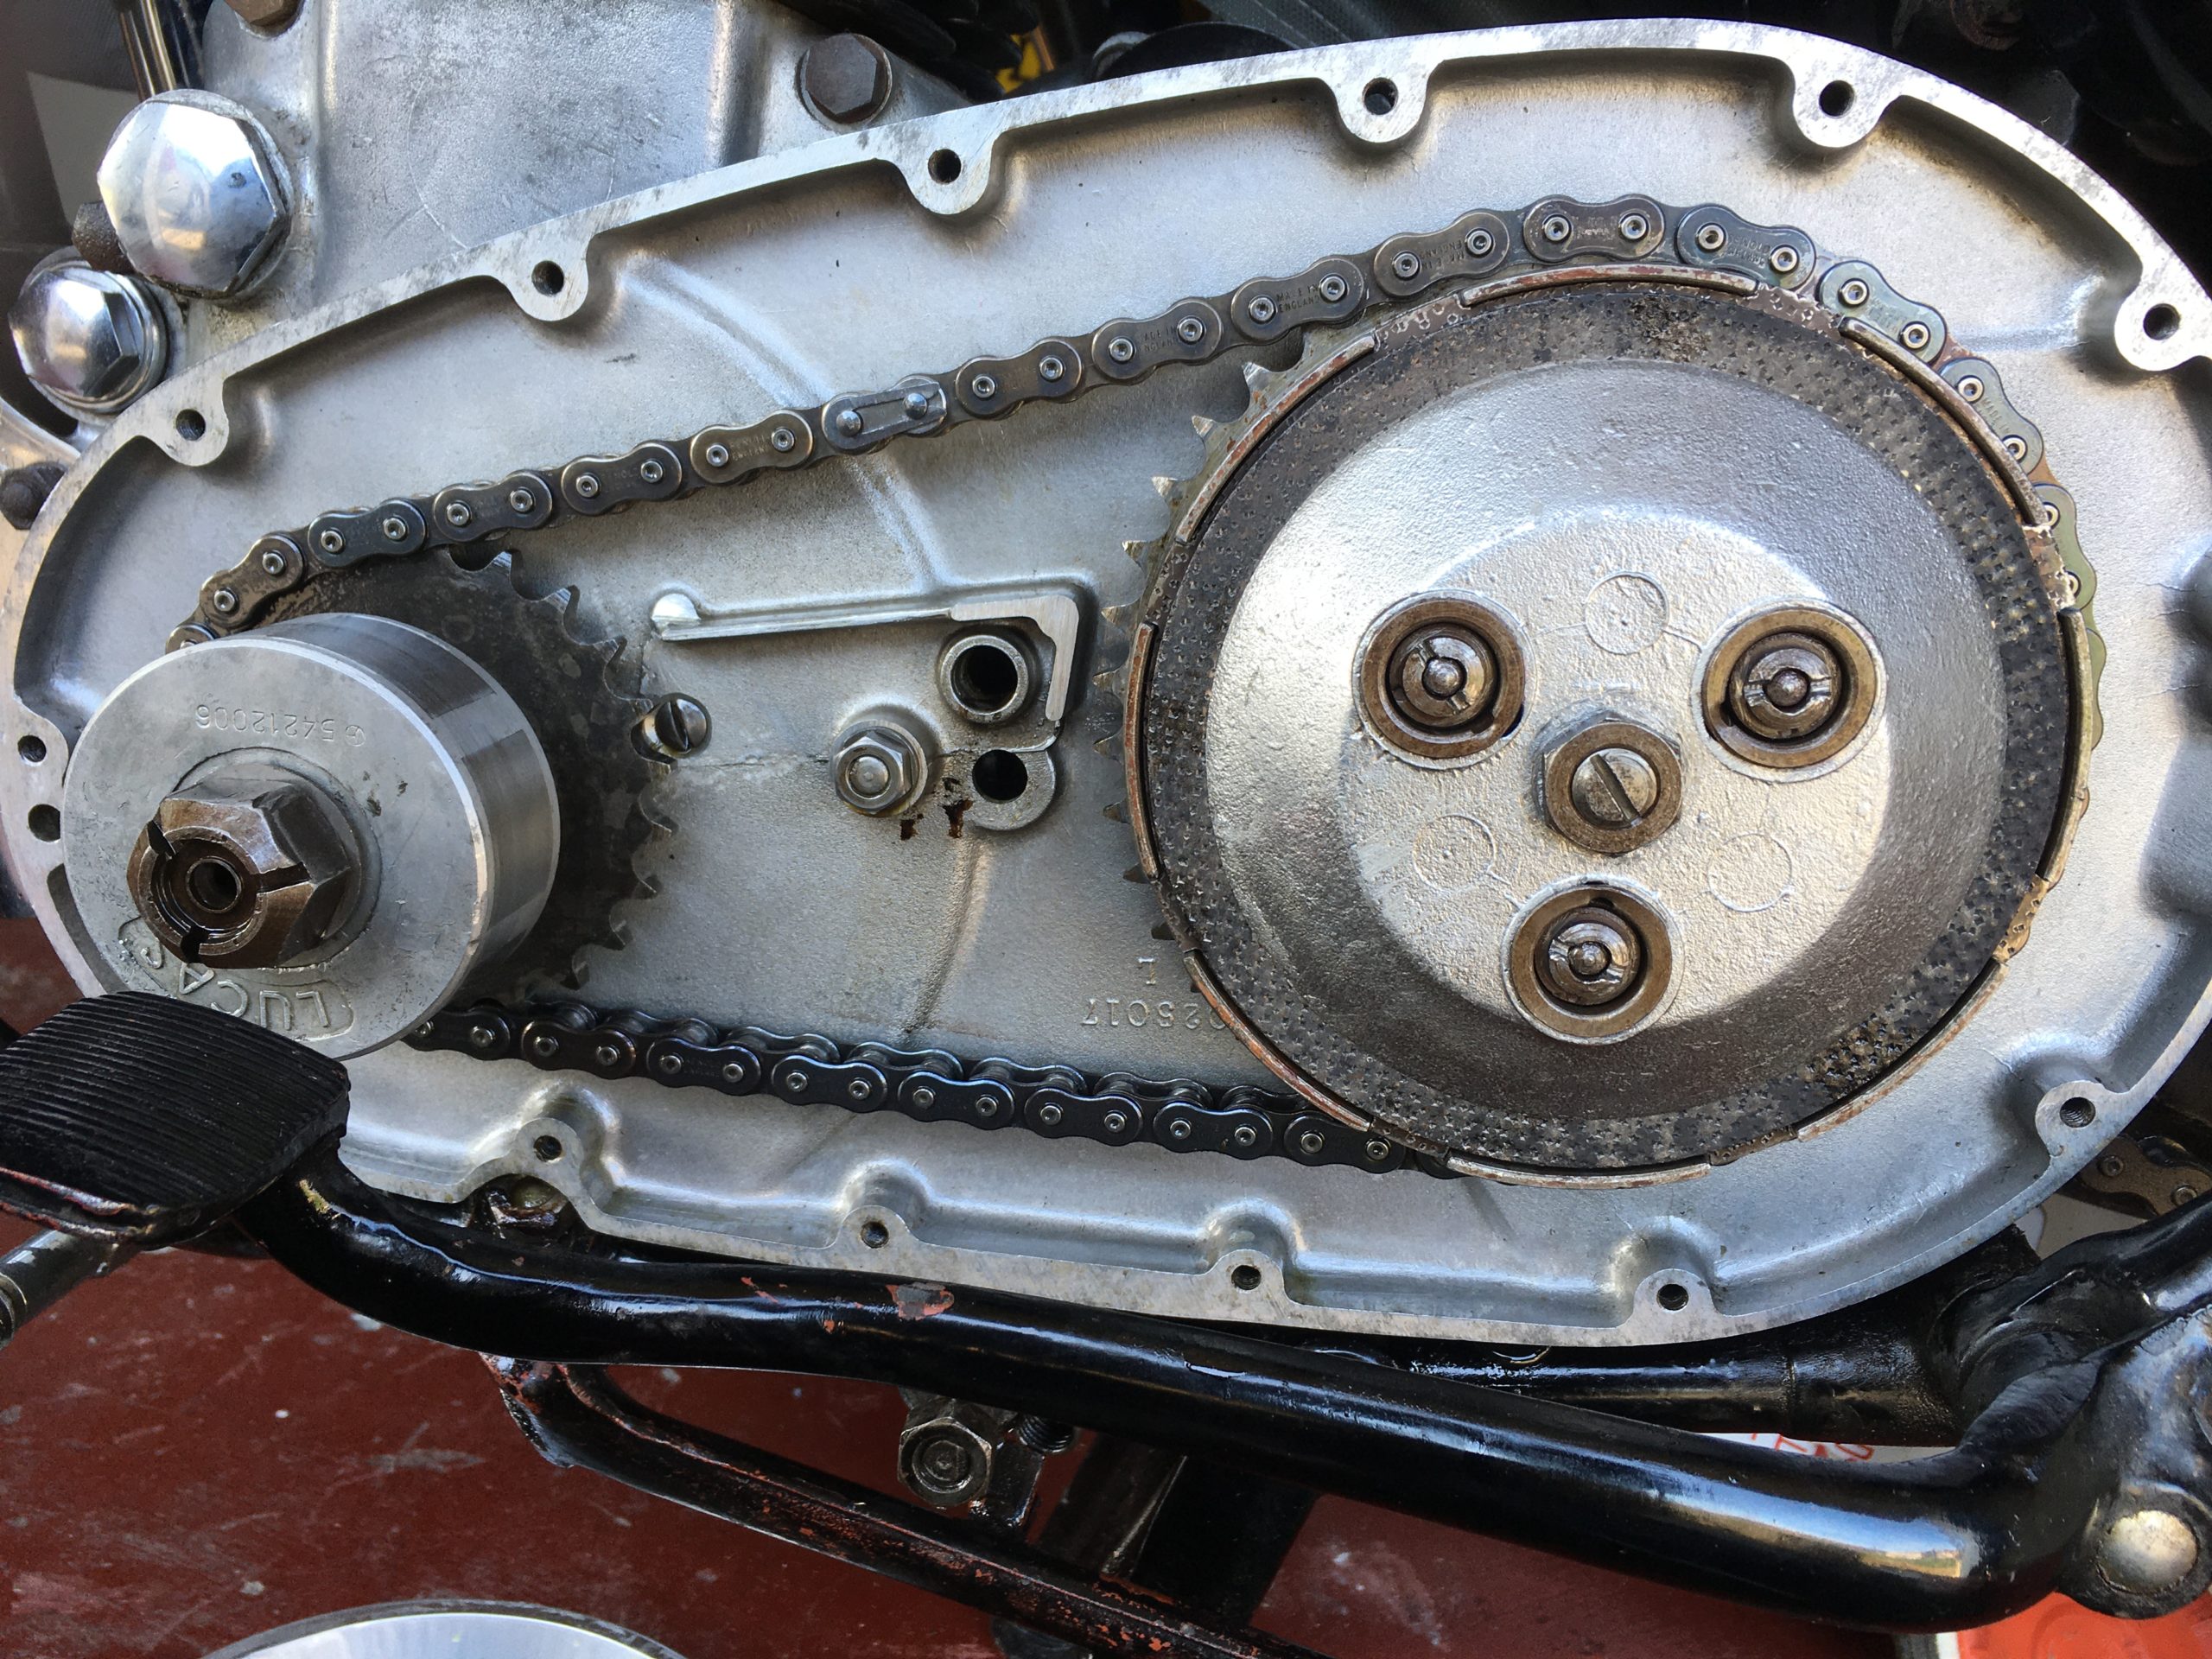
Chain On and Ready for Outer Cover
Next, replace the chain. I inserted one side of the link in the loop that went round the drive sprocket and positioned the chain over the deep part of the chain case above the shrouded cable hole. That allowed me to slide the other side of the chain, having gone around the clutch, over the split link, then fit the other half of the link then the clip; the closed end of the clip faces the direction of rotation of course. Check the chain tension.
Now adjust the clutch cable at the gearbox, to leave about a sixteenth of an inch of free play at the adjuster, nip up the lock nut. Check that as the clutch lever is operated, the pressure plate moves out equally all round. If it doesn’t, you will need to adjust the relevant one of the three adjusters. Re-check the cable adjustment if you adjust the clutch springs.
I then coated the two case half mating surfaces with Wellseal, installed a new gasket, then pushed the stator cable through the shrouded hole (*) carefully whilst carefully replacing the cover, bit by bit. The brake lever did of course, need to be depressed as before to fit the cover. Be careful when fitting the cover not to damage the stator housed in the outer cover…the magnet will tend to grab things if you aren’t careful.
(*) this is incorrect and I’ve corrected it here.
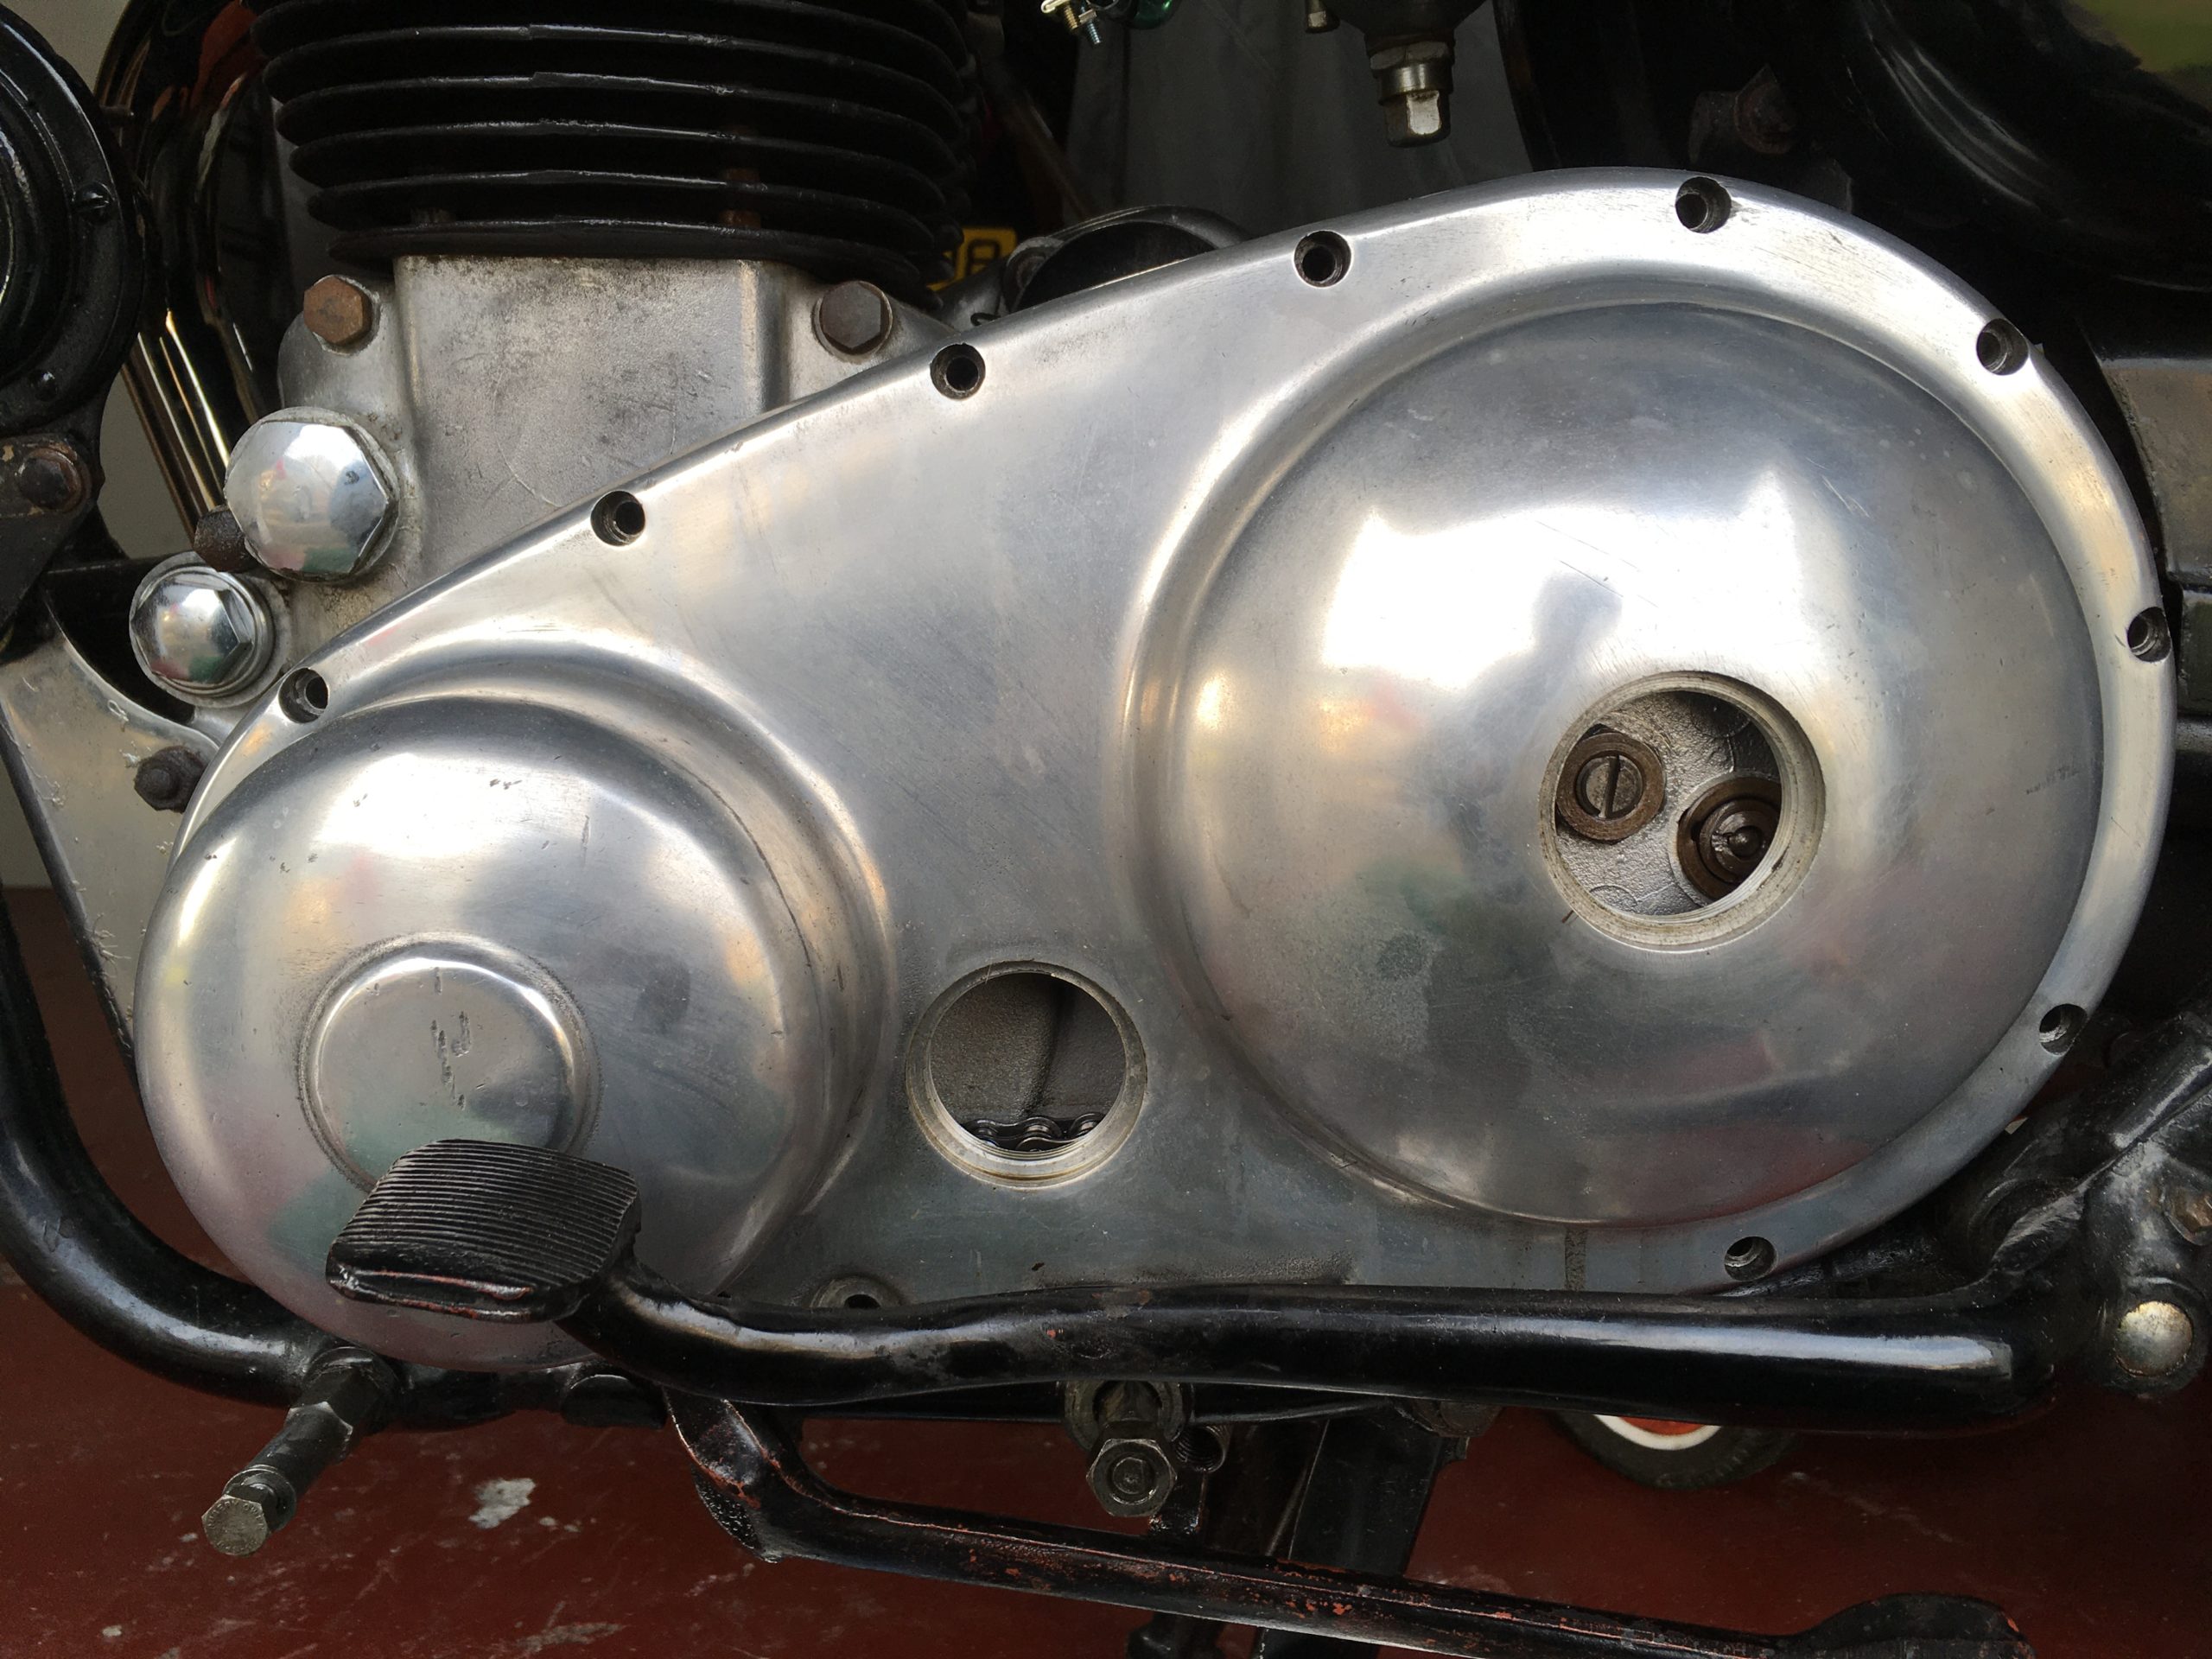
Outer Cover in Place
Check the gasket is aligned with the holes, then replace the fourteen screws. Nip them little more than finger tight first, then tighten diagonally, then one after the other…be careful not to overtighten them.
Replace the drain plug and clutch centre inspection cap, taking care not to misshape the leather seal. Put 230ml or 8 fluid ounces of SAE 50 engine oil into the chain case through the inspection hole. The oil should just touch the bottom of the chain. You should be able to turn the engine over to make sure the oil does get onto the chain.
Reconnect the three wires from the alternator to the matching coloured cables above the gearbox. Make sure the bullet connectors are properly pushed home, then replace the cover. Replace the chain case inspection cover, taking care not to misshape the leather seal. You’ll need to put the rear brake switch and pedal back as it was, and reinstall the exhaust pipe and silencer after refitting the foot rest.
I don’t think I’ve forgotten anything…start your bike and give it a try.
As for my bike…the clutch felt much better…but it still didn’t want to make first gear selection an easy task. That fault was pretty much unchanged, but had I not refurbished the clutch, there could have been much more damage. Now to the gearbox!
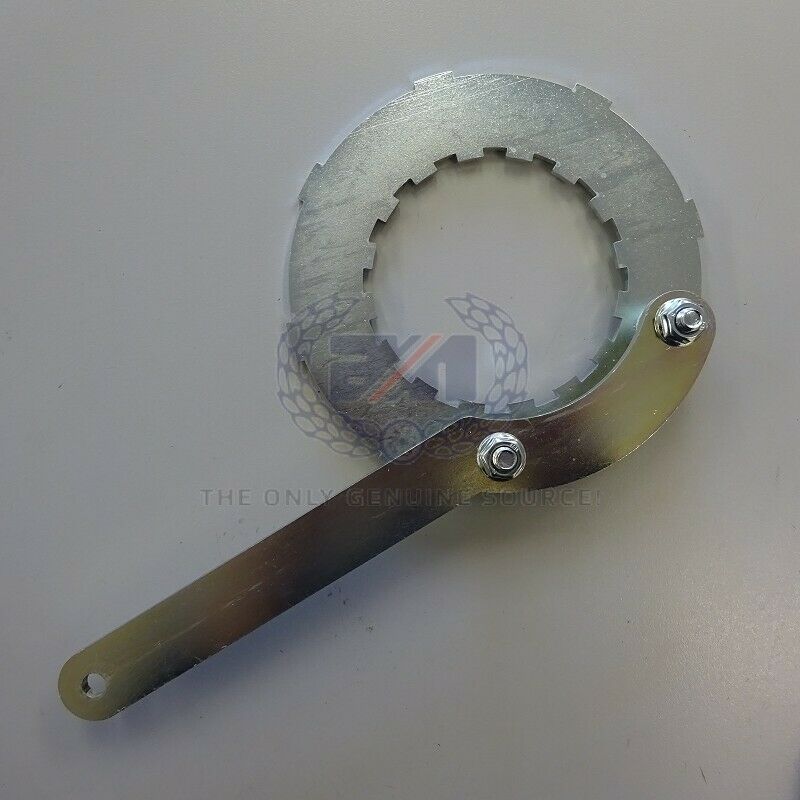
AMC Clutch Locking Tool
This is the clutch locking tool. The photo is from Andover Norton but I bought the same tool from Steve at AMC Classic Spares for the same price. On the same order were the six shock absorber rubbers. The handle on this tool is quite painful to use as-is. It needs a piece of pipe to extend the handle and to provide a soft handle. You need this tool…it’s almost impossible to do the job without it. You could get by with a C spanner, but this tool allows you to do other things.